![]()
Bodywork Part 2
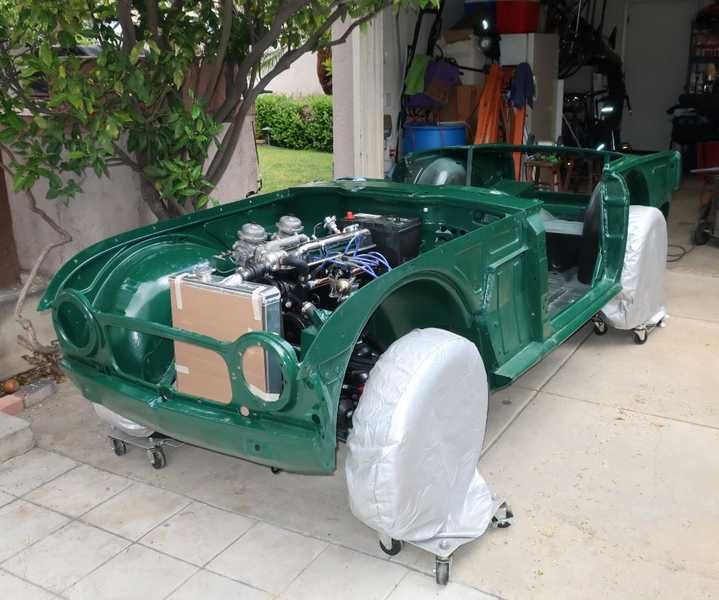
Part 1 describes the repair of the floors and rocker panels which, for reasons given in that chapter, had to be performed with the body on the frame. This section describes further work on the main part of the body, with the body removed from the frame. Much of this involved preparation for paint; painting is described here.
Click on any picture to see a larger version in a new window.
Contents
- Body Removal
- More Rust Repair
- Door Gussets
- Seat Mounts
- Body Cracks
- Minor Repairs
- Body Reinstallation
Body Removal
With the floors and rockers completed, the body was ready to be lifted off the frame. To minimize weight, I had already gutted the body and removed the fenders, doors, hood and trunk lid. All the fasteners and fittings attaching the body to the frame had been removed much earlier, as it was necessary to lift the body a few inches occasionally to replace the floors.
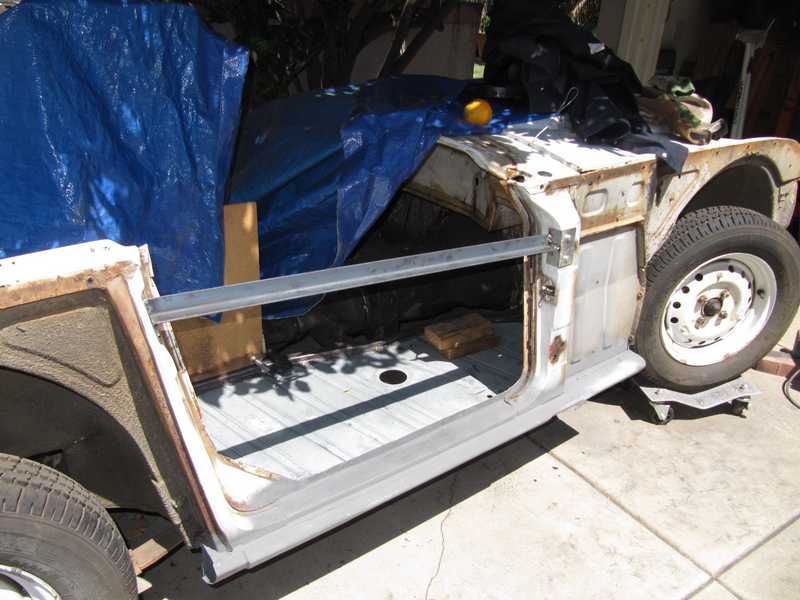
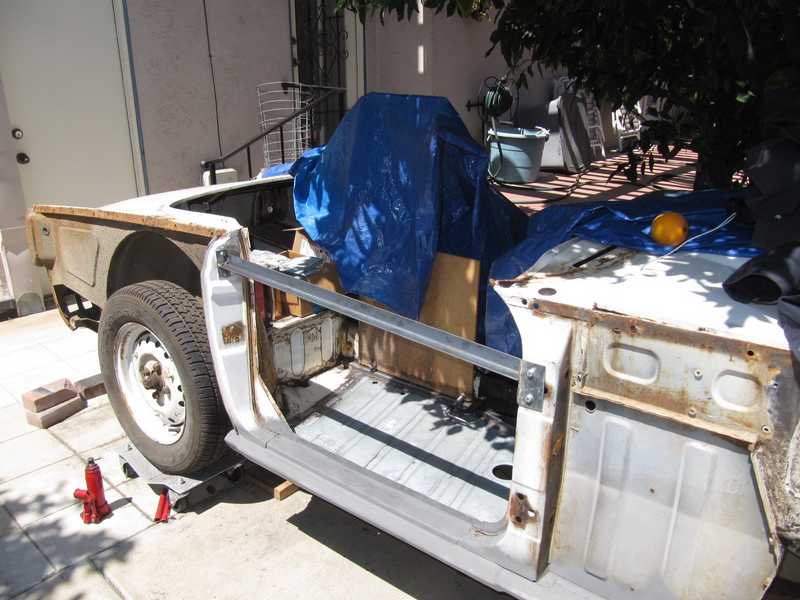
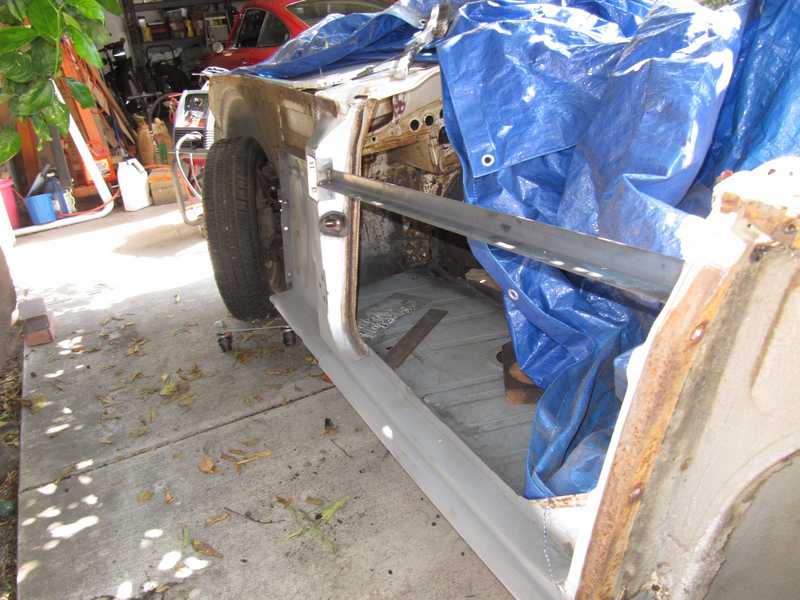
Door Braces
I made braces for the door openings. I didn't want them welded to the body, as is sometimes done; instead, I made flanges so they could be bolted to the body in the holes for the door hinges and latch. Many will tell you this bracing isn't necessary, but I'm skeptical; in any case, it's cheap insurance.
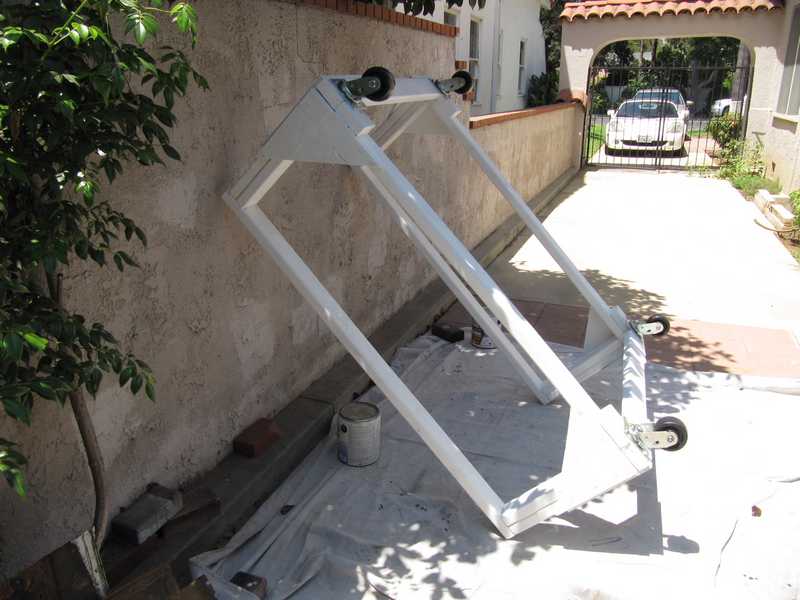
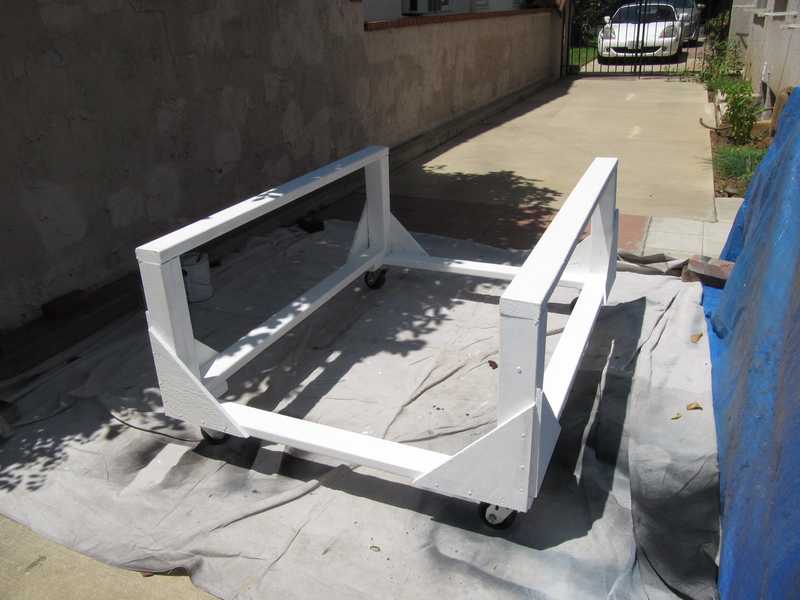
Body Cart
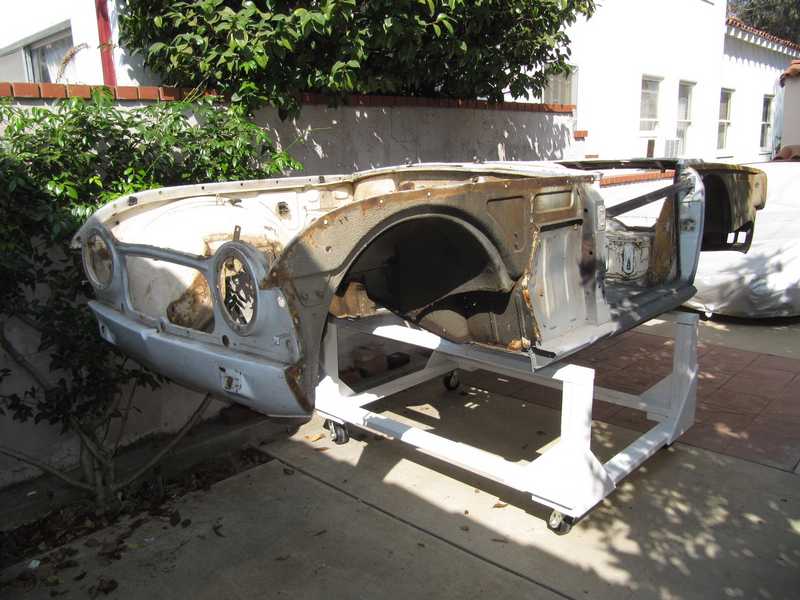
I built a special cart to hold the body, so I could work on it and move it around easily. It's a simple wood structure made from 2x4 lumber.
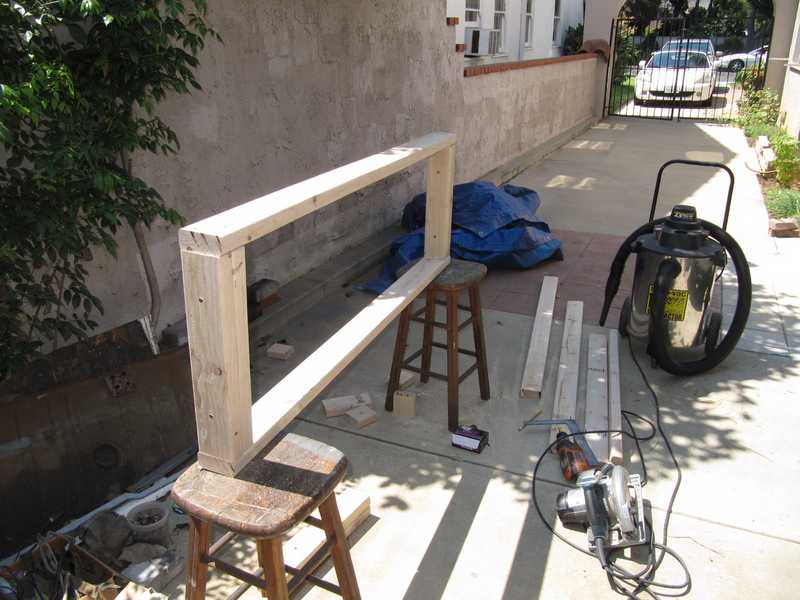

The cart uses no truss pieces, as they would restrict access to the underside of the body. Instead, plywood gussets support the corners. Below, the gussets have been installed (with screws and glue), and I've started to paint the structure. I gave it a couple coats of exterior latex primer, but no finish coat. That should protect it for the limited time it will be used.
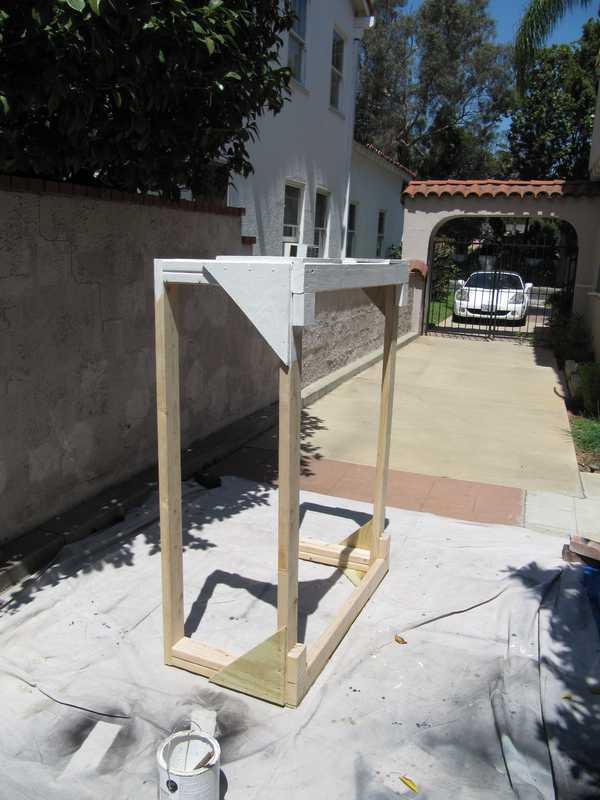
The casters were installed with 5/16-inch lag screws. In the final picture, it's finished and ready for use.
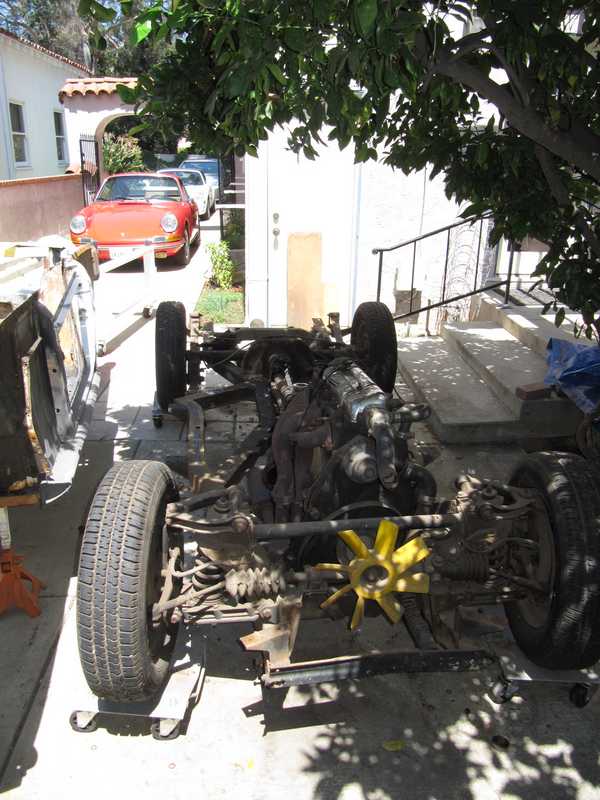
Body Removal
I used my shop crane to lift the body off the chassis. I realized that I had made a fundamental error in the design of the cart: the legs of the crane wouldn't fit under it. I couldn't slide the cart under the car with the crane in place, and I couldn't get the chassis high enough without the crane. I set the body temporarily on a set of jack stands.
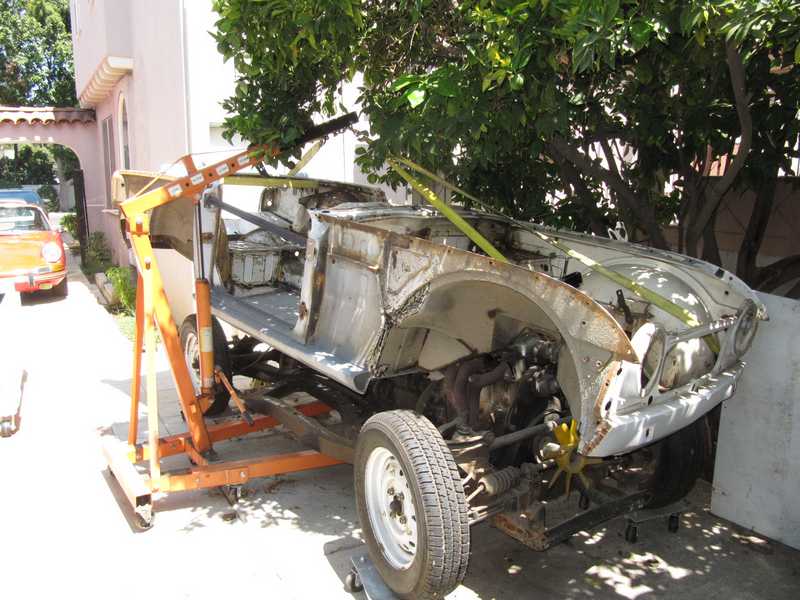
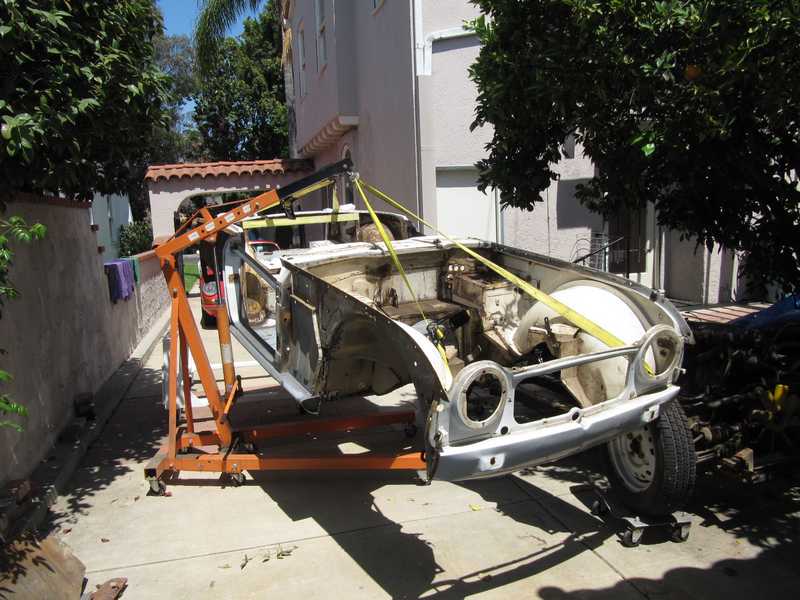
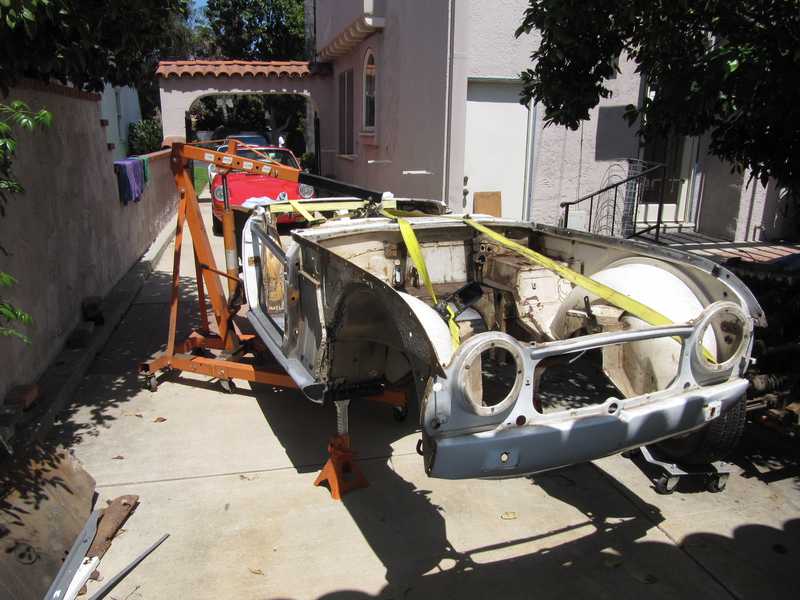
Eventually I moved the body to the cart by first setting it onto some stands, sliding the cart under it, and removing the stands. The body is not very heavy, so this trick wasn't difficult. On the cart, the body was easy to move around, and I had safe, convenient access to both the underside and inside.

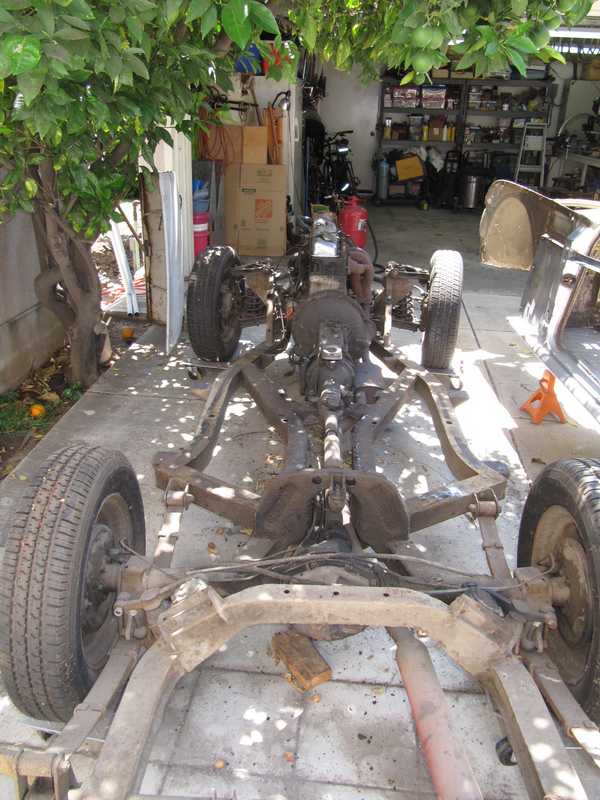
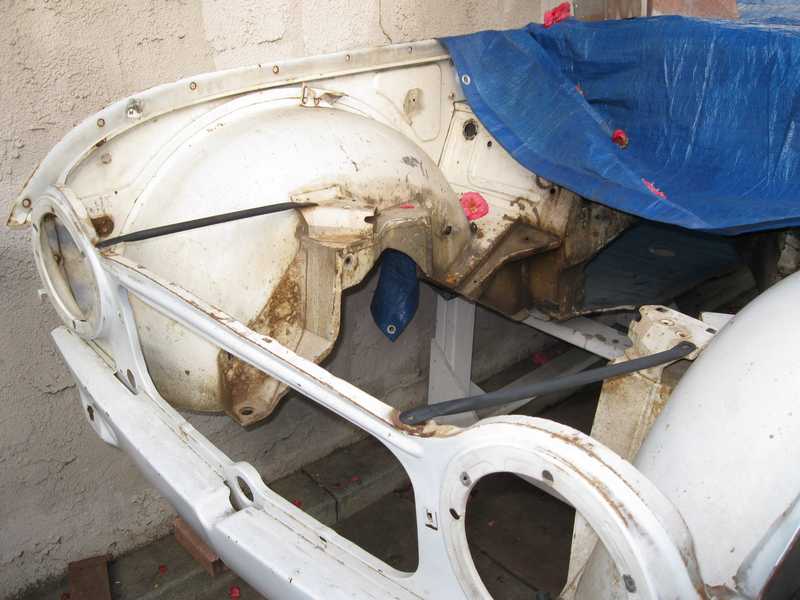
I then had the chassis staring up at me, in all its grungy glory. It was a little sobering to look at it and imagine all the work still to be done.
More Rust Repair
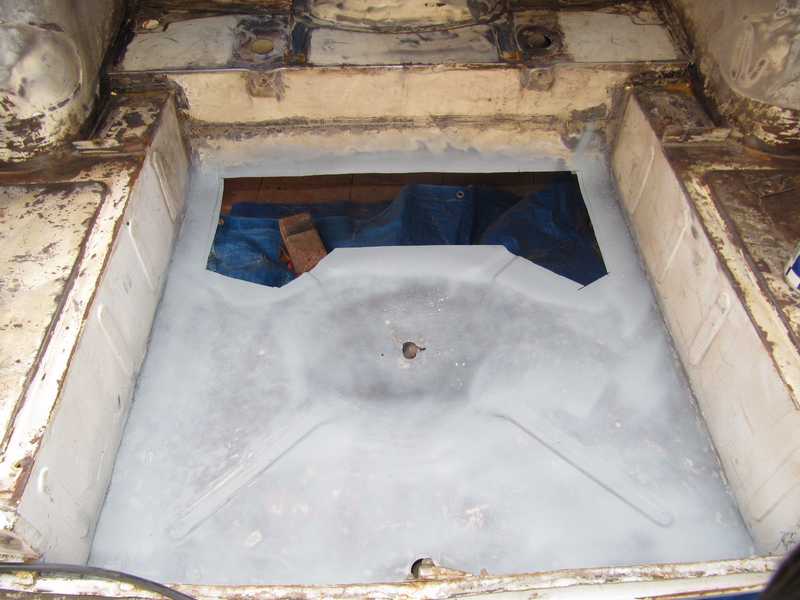
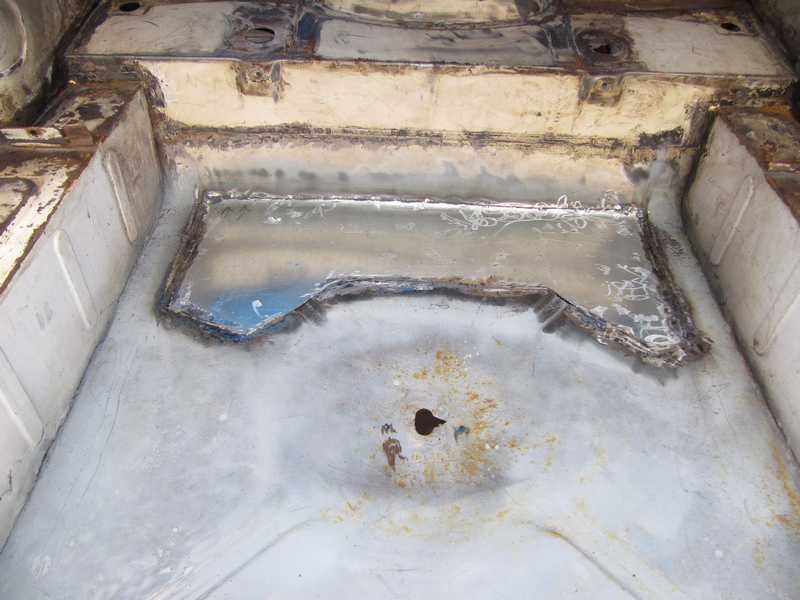
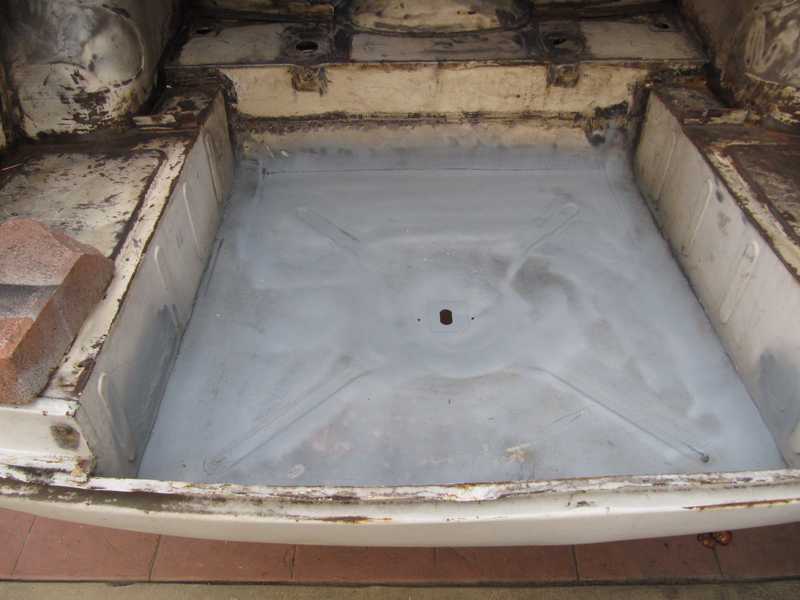
Spare-Tire Well
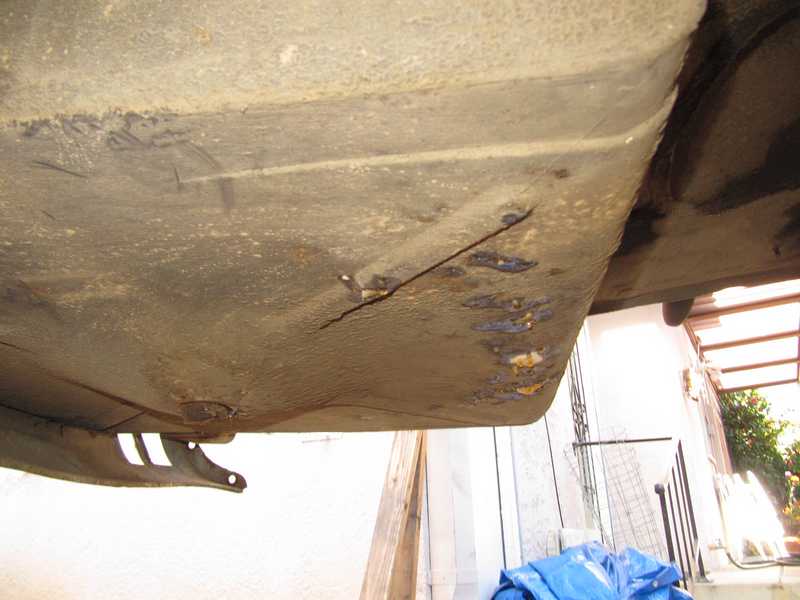
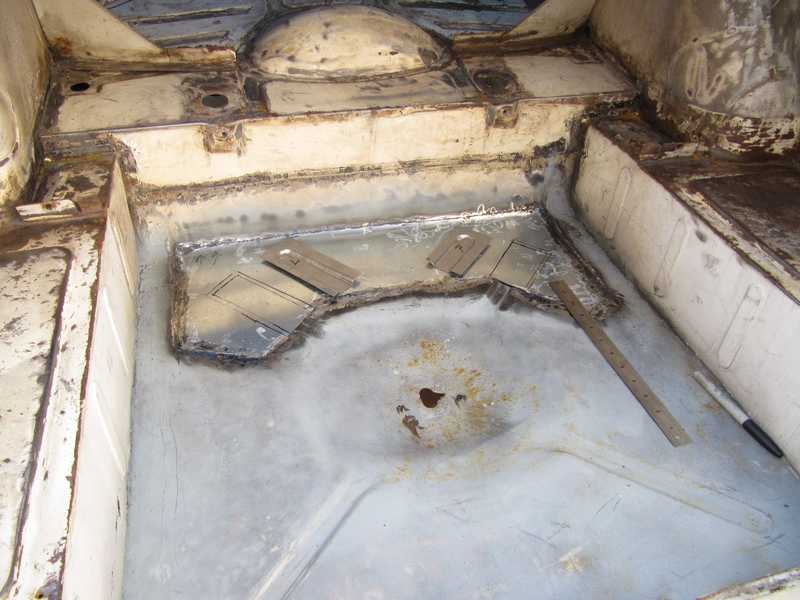
The spare tire well, in the trunk, had a fair amount of rust and a fiberglass repair. It had been painted over on the inside with some kind of ordinary, nonautomotive paint. I wasn't sure if I could patch the rusted area with sheet steel, but it was worth a try, since a repair piece cost upwards of $350. And, since it's largely out of sight, the repair didn't have to be perfect.
This was one of the more difficult rust-repair jobs, as the floor of the well was not flat, the part that should have been flat had sagged, and the forward edge was curved. I also had to figure out a way to reproduce two of the stiffening ribs, which were rusty and thus had to be removed. The result was not spectacular, but I think it was adequate.
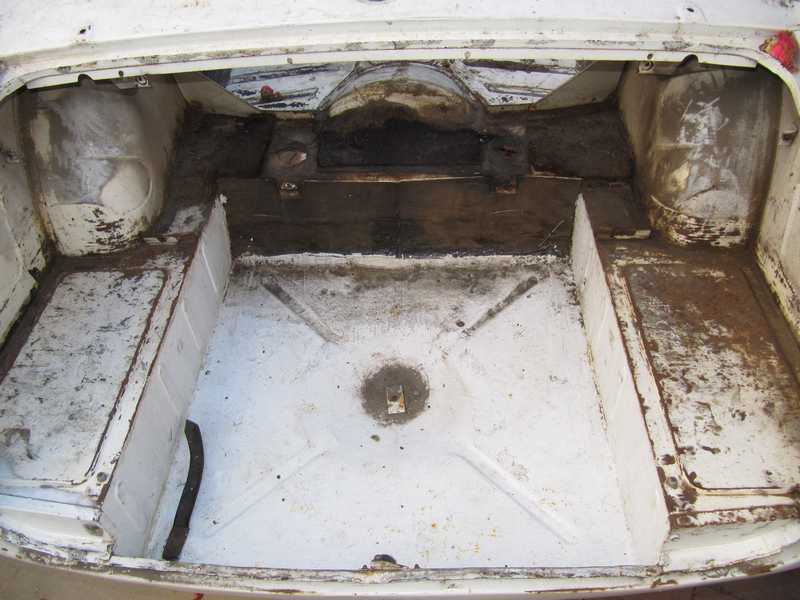
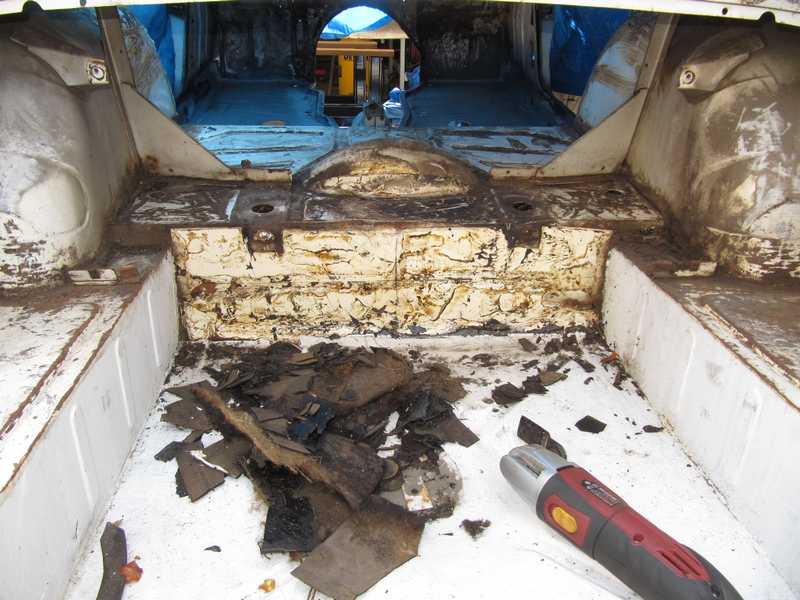
The front of the trunk, like the rear of the passenger compartment, was covered with sheets of a black, tarry material about an eighth of an inch thick; it looked a lot like the sound-absorbing insulation used commonly today, but without a reflective coating. A fiber pad covered the black stuff. A similar-looking material served as a sealer for the body seams.
I found that an oscillating multitool took off most of the stuff fairly easily. I followed it with a solvent (naphtha) wash and, when the surface had dried, a conical wire brush on my angle grinder.
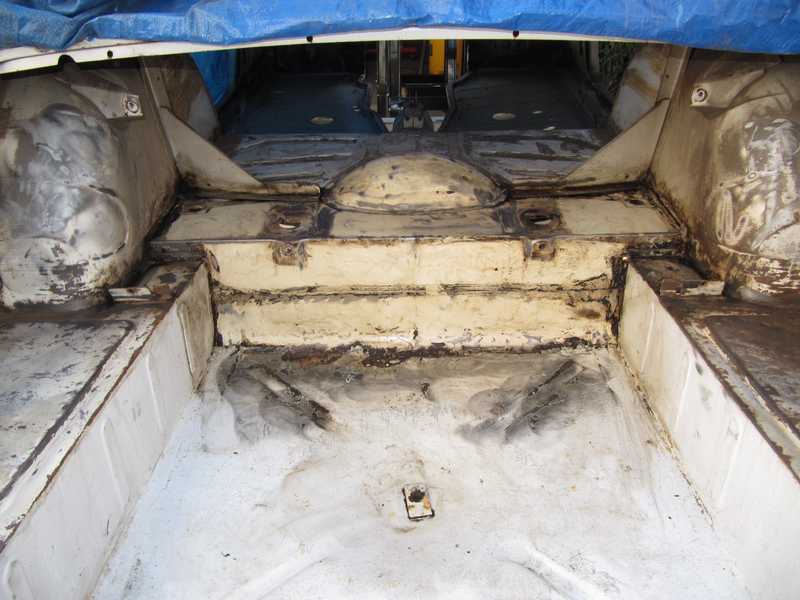
I sanded off the paint and fiberglass in the area of the rust holes. Because of the deep rust pitting and many small holes, I decided to cut the floor back to solid metal. The patch would be large but, in the long run, it probably would be the easiest approach.

To make sure there was no more rust, I removed the rest of the paint in the floor of the spare-tire well. It had some light pitting, but nothing more serious. I gave it a light coat of weld-through primer to prevent further rust formation. The primer was eventually removed before painting.
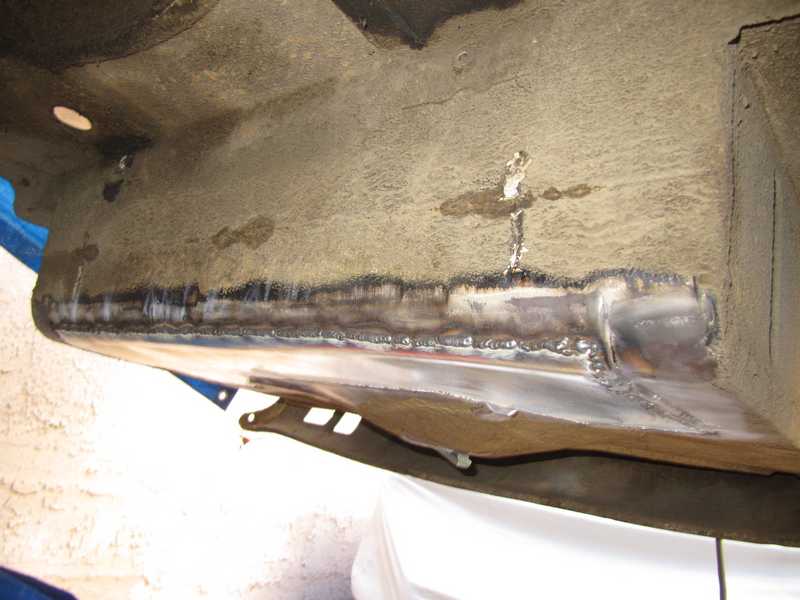
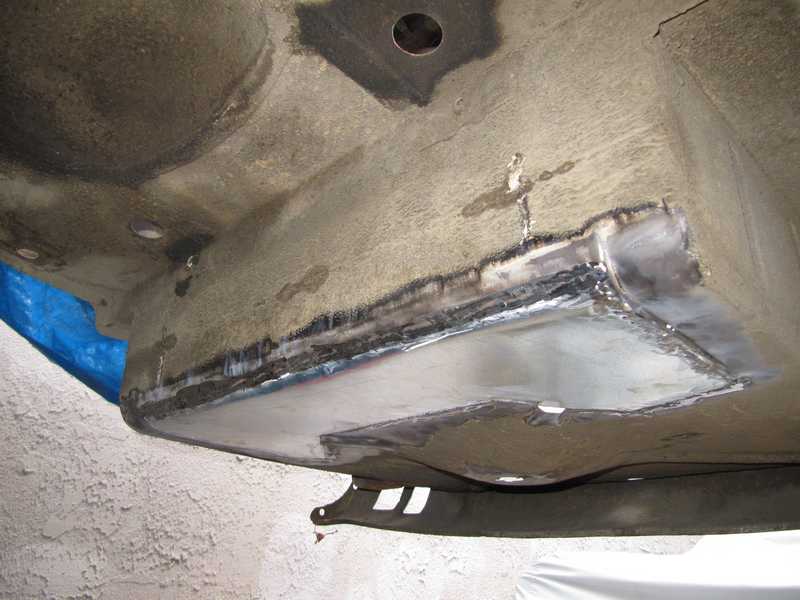
The usual procedure for repairing the spare-tire well. First, cut a patch to fit the hole. That requires seemingly endless checking and trimming. Next, tack weld it into place, then complete the weld.
Finally, grind down the weld.
I decided to weld the front edge from under the car, as the convex surface would be easier to grind. In the first picture below, it is welded, and in the second, ground smooth.
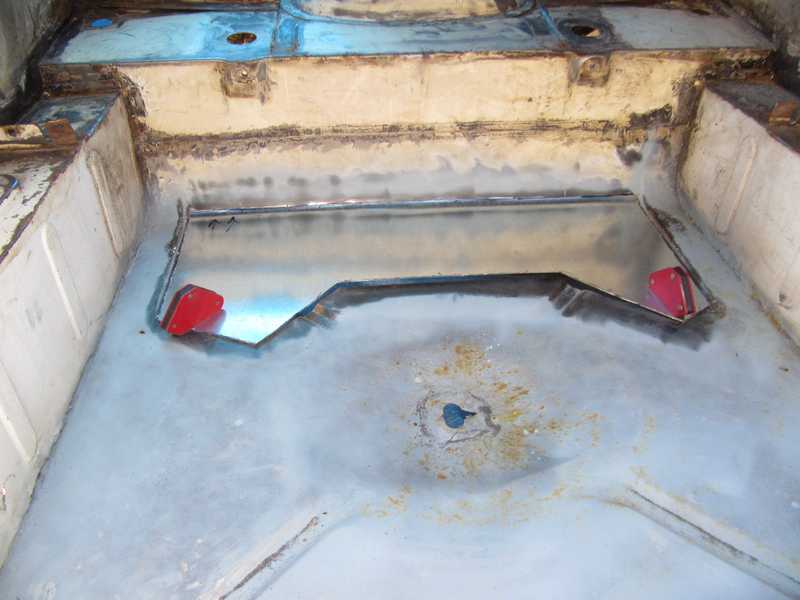
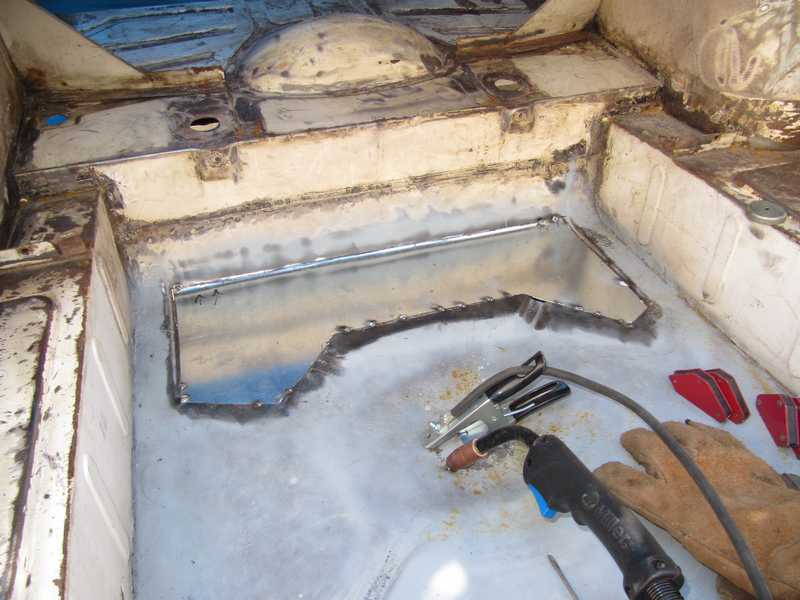
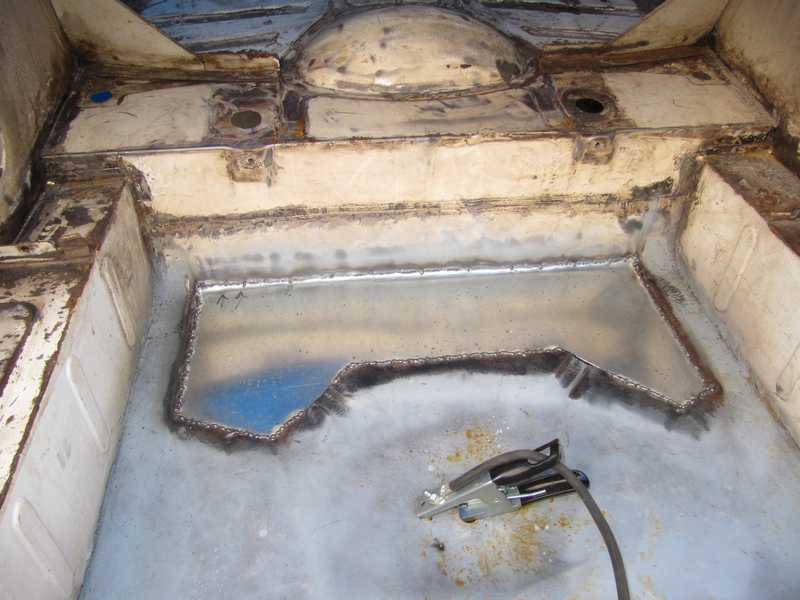
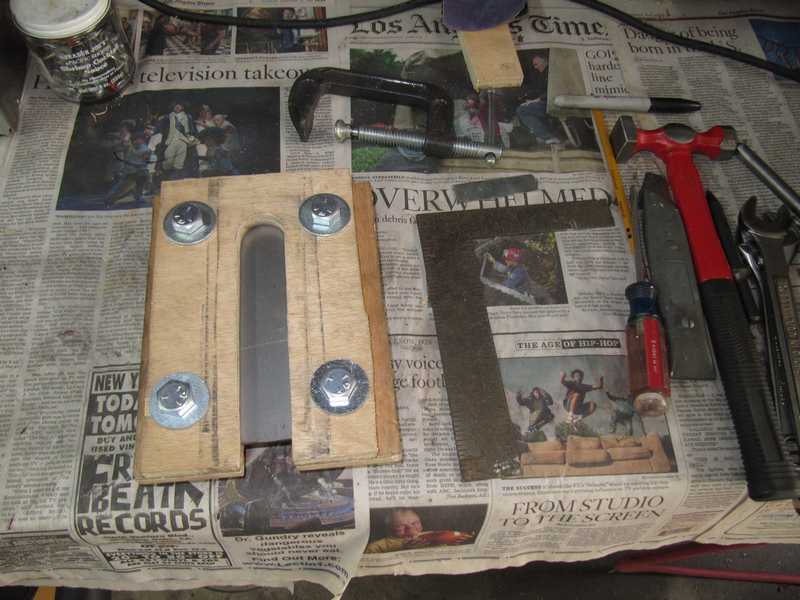
Now for the stiffening ribs. I decided to make the ribs as separate parts and to weld them into place. There really isn't any other way to do it, unless, of course, you have lots of sheet-metal fabrication equipment. I don't.
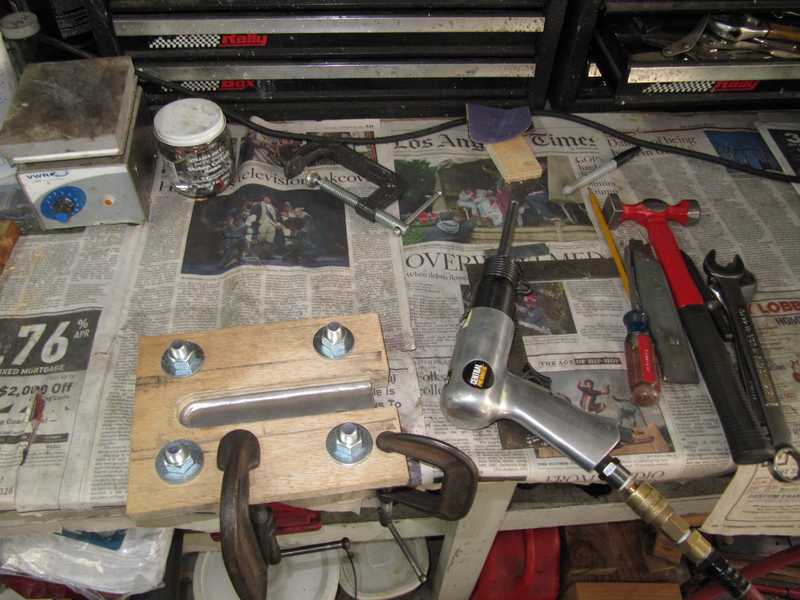
To fabricate the rib pieces, I first made a two-piece form out of plywood, bolted together with 1/2-inch bolts. To make the shapes, I ground the end of an air-hammer tool into a hemisphere, placed a piece of sheet metal into the form, and hammered out the shape with the air hammer. The finished pieces were not as smooth as I'd have liked, but I figured that a little body filler and primer would fix that.
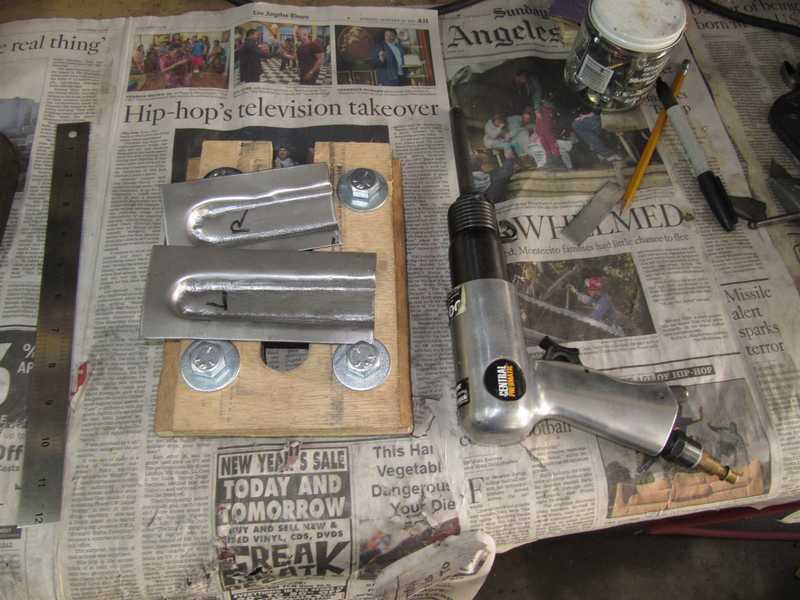
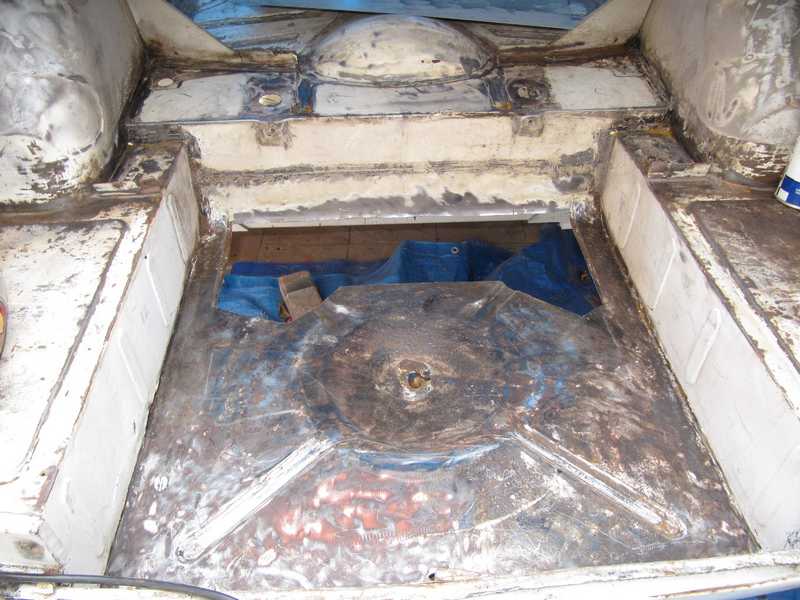
I traced the piece, cut rectangular holes in the new panel, and welded the stiffening ribs into place. At the same time, I fixed the center hole, which had rusted.
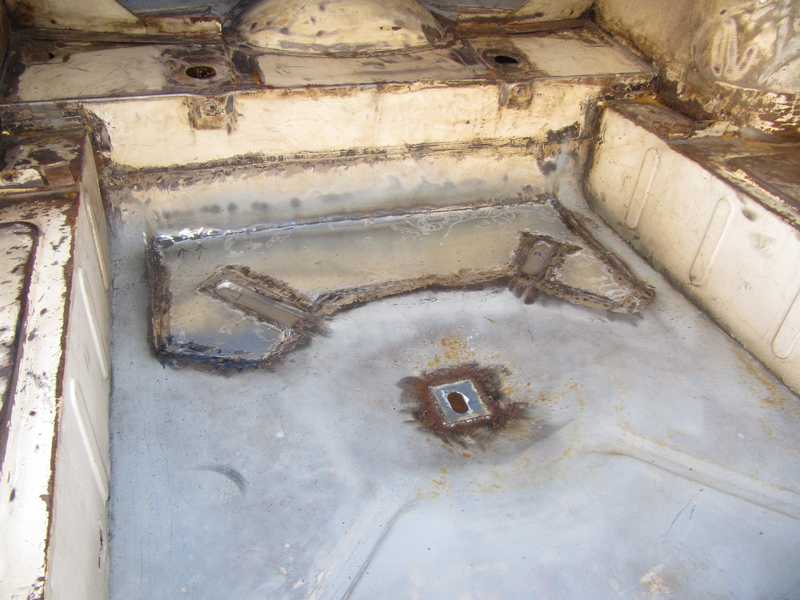
To prevent rust until the trunk was painted, I applied a final coat of rattle-can primer. That primer was sanded off before painting.
The job wasn't perfect; I encountered some distortion in the panels, and I made little attempt to hide the weld seam. A little body filler should smooth it off, though. Whatever its cosmetic flaws, it's still a good, solid repair, and, in the final analysis, it's just the trunk. It doesn't need to be pretty.
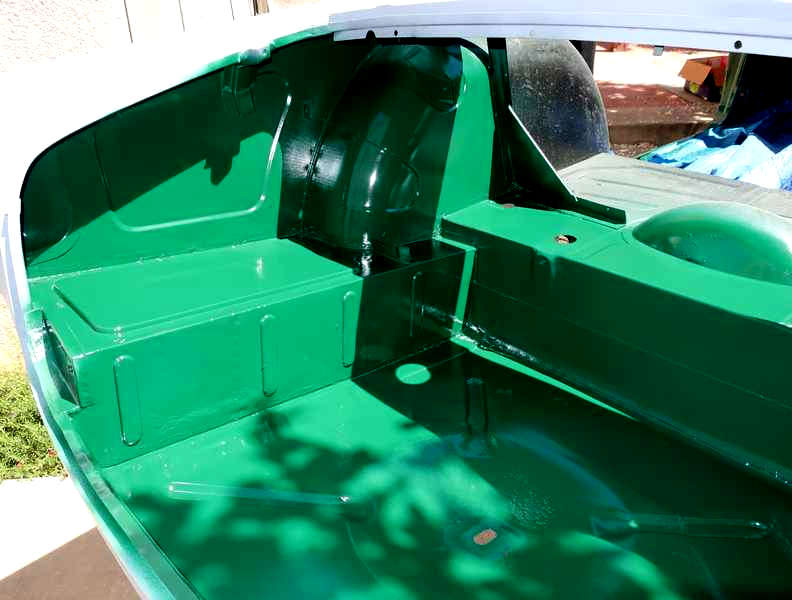
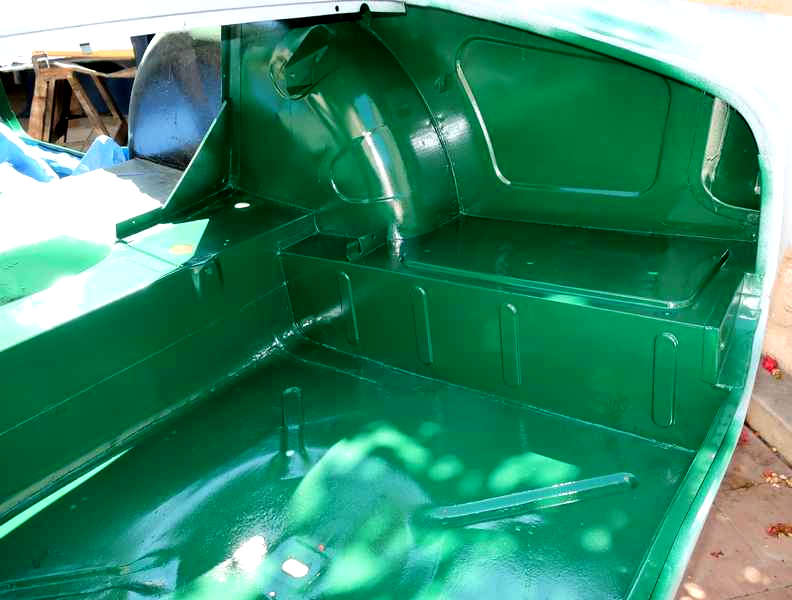
Anyway, here it is, painted. See the Paint page for more about what went on between this and the previous picture.
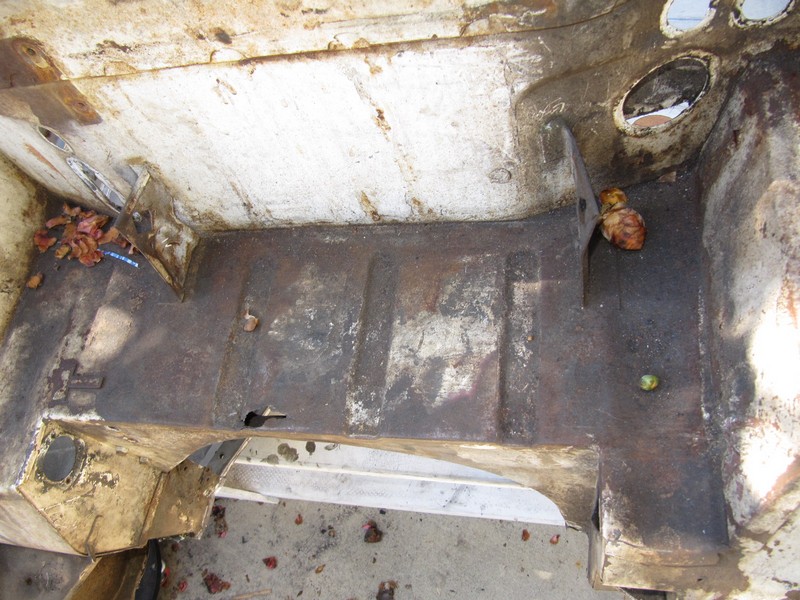
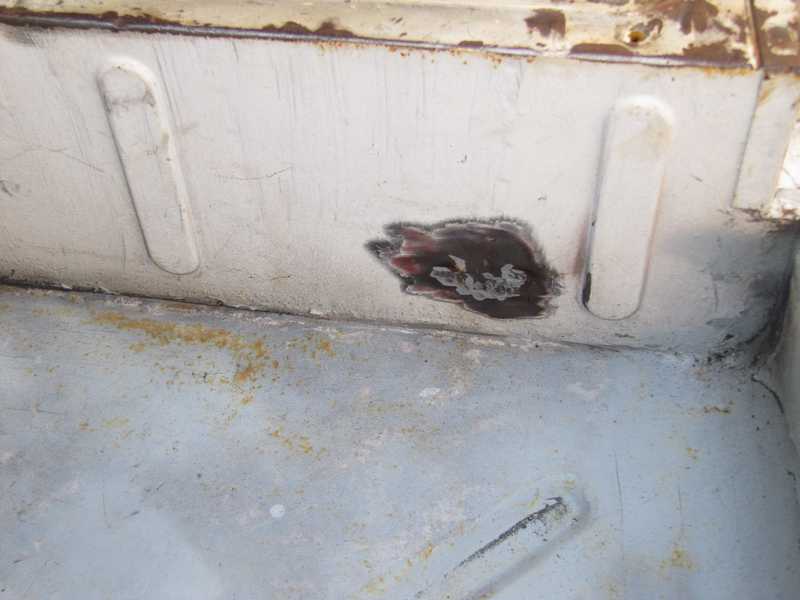
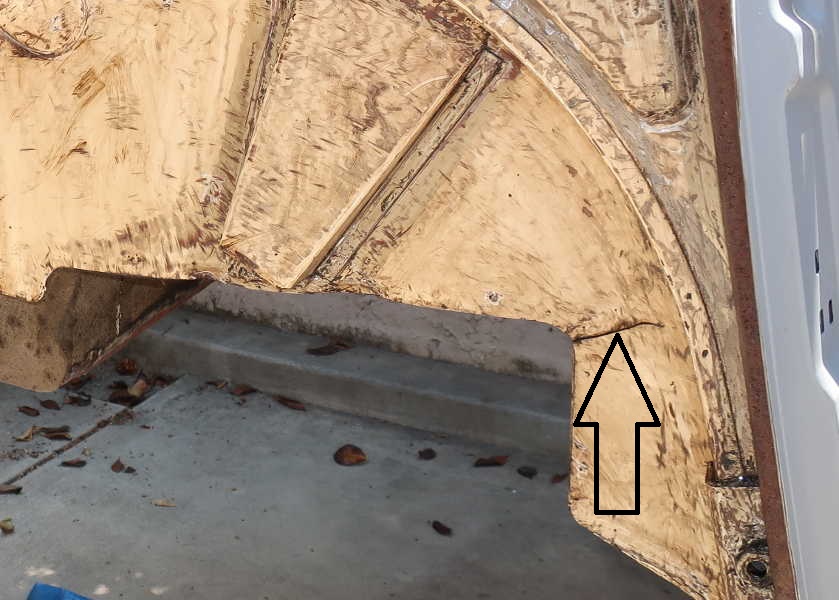
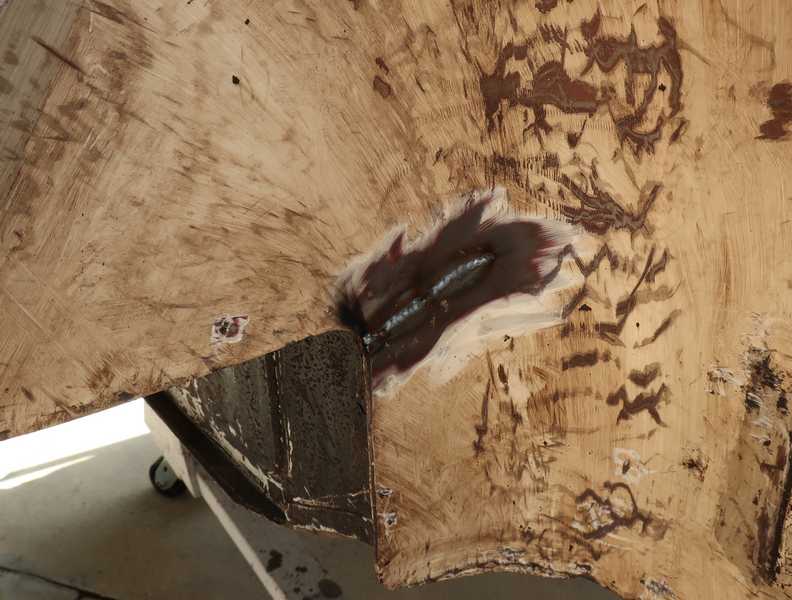
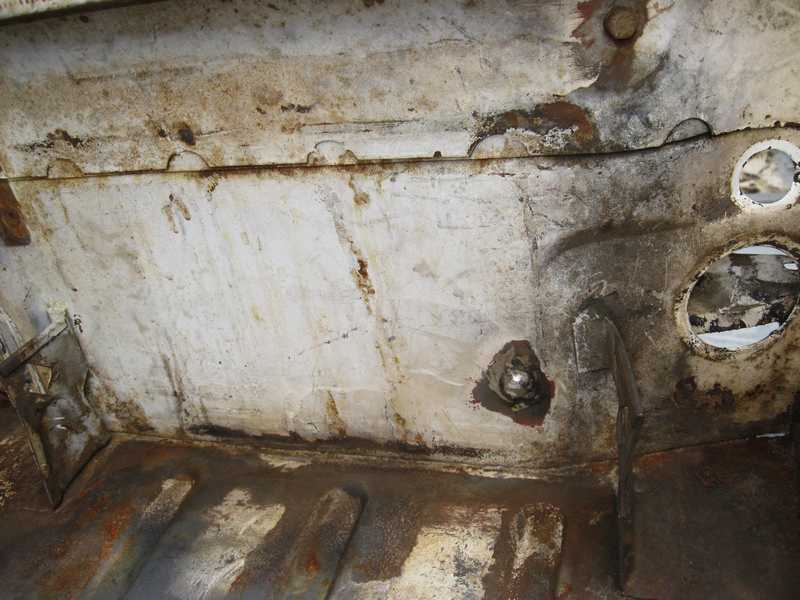
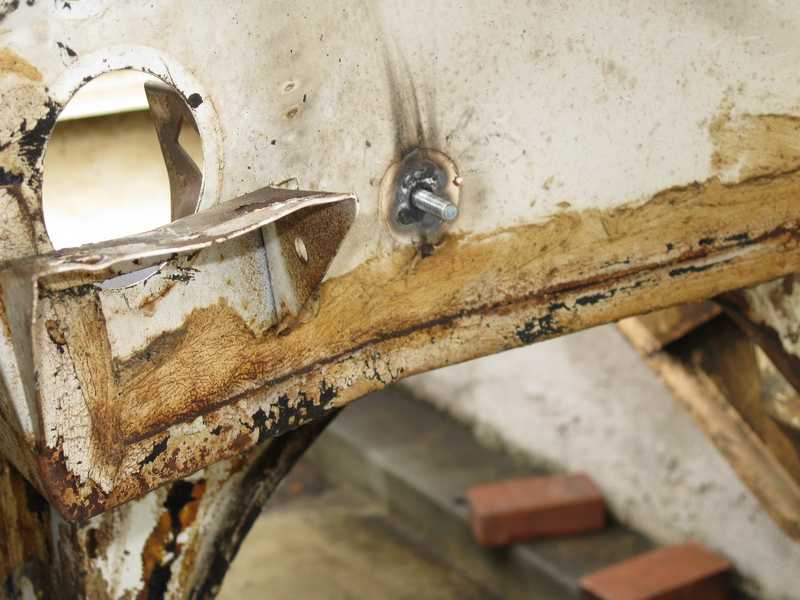
Battery Box
The battery box had a small hole. It didn't look like a rust hole, because the rest of the metal in the floor of the battery box was solid and had minimal pitting. No idea how it happened, but obviously it had to be fixed.
To fix it, I first cut it square, made a patch, welded it into place, and ground the weld flat. The usual procedure.
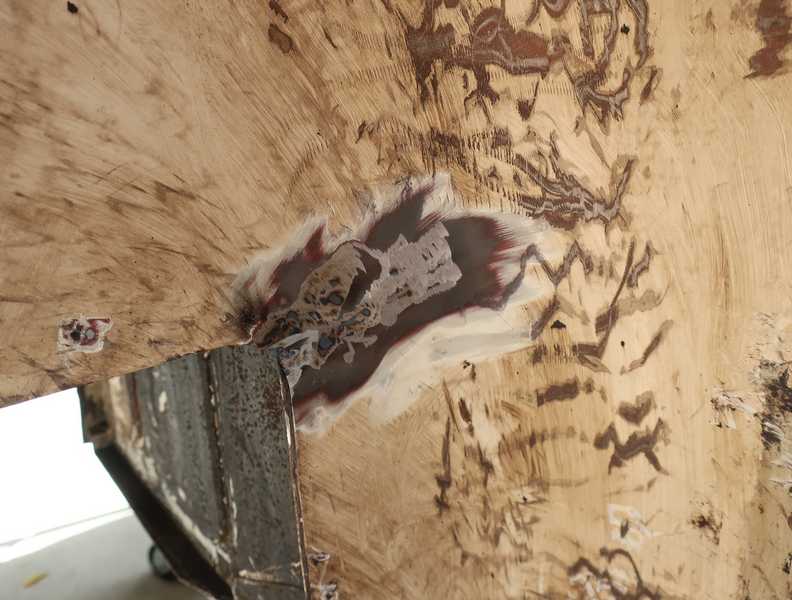
To prevent further rust, I gave the patch a coat of rattle-can primer. The primer was only temporary, removed when the engine compartment was painted.
Below is a detail of the battery box, painted. The repair is invisible.
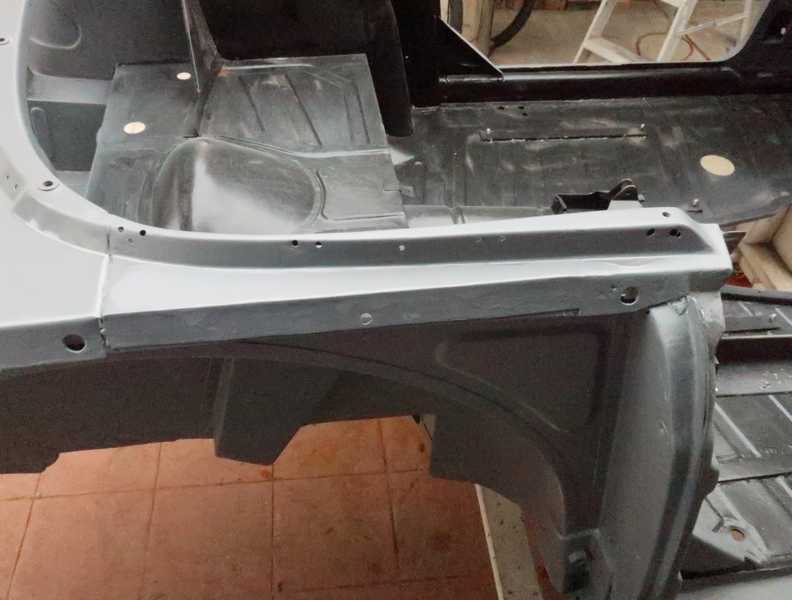
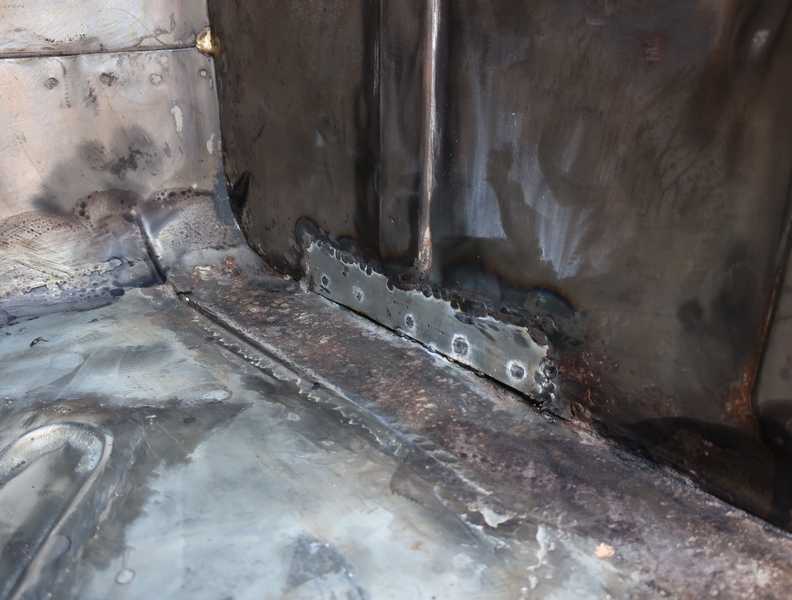
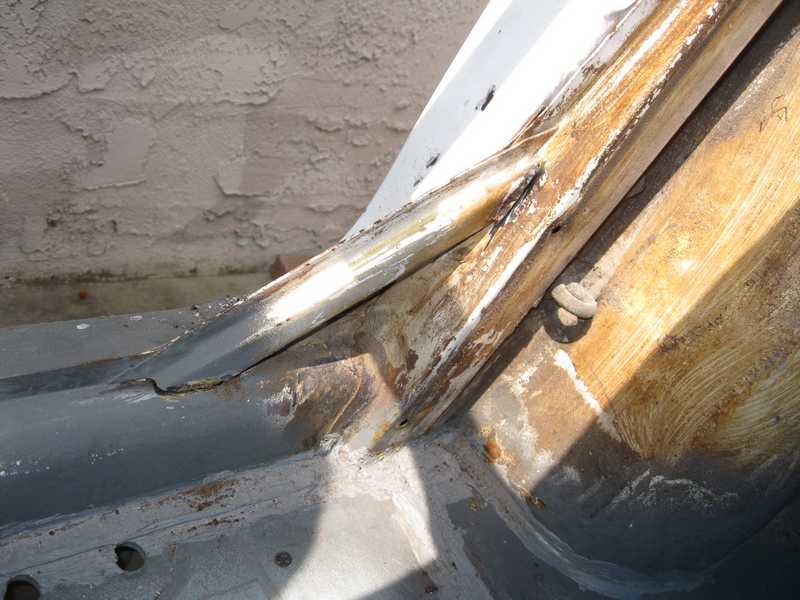
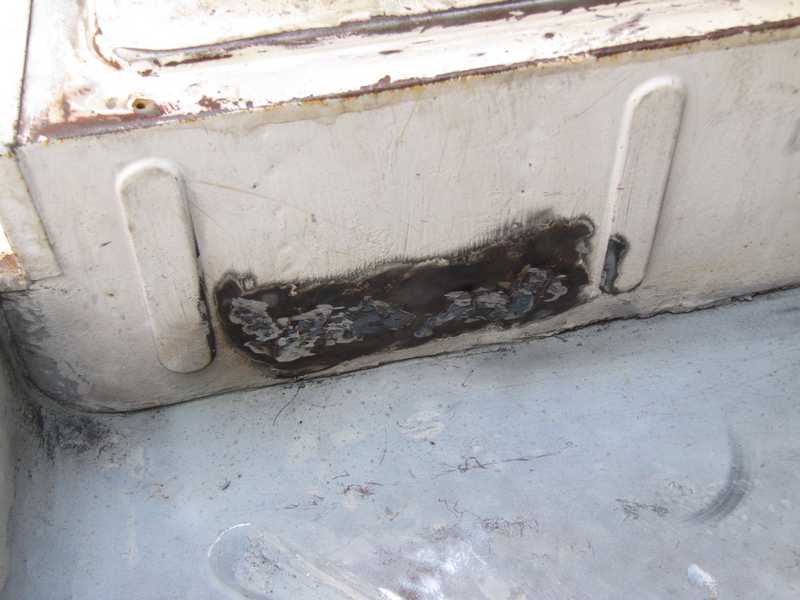
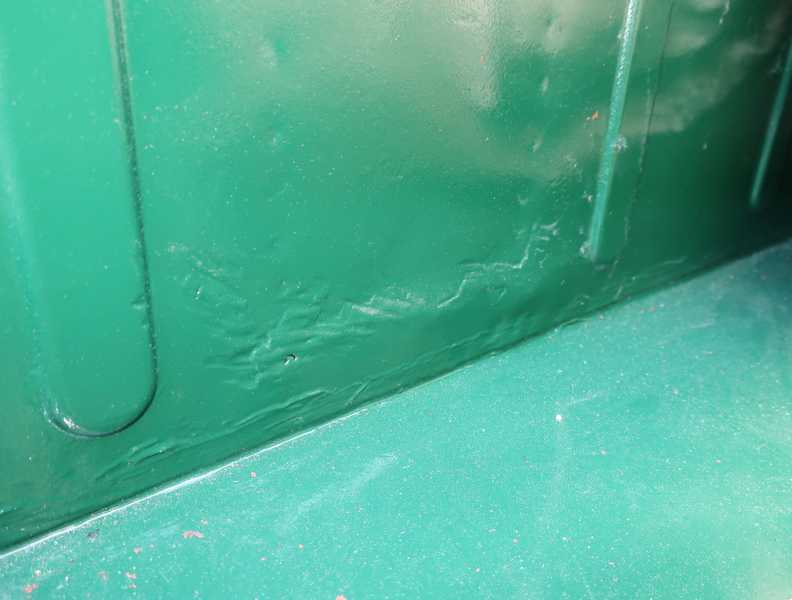
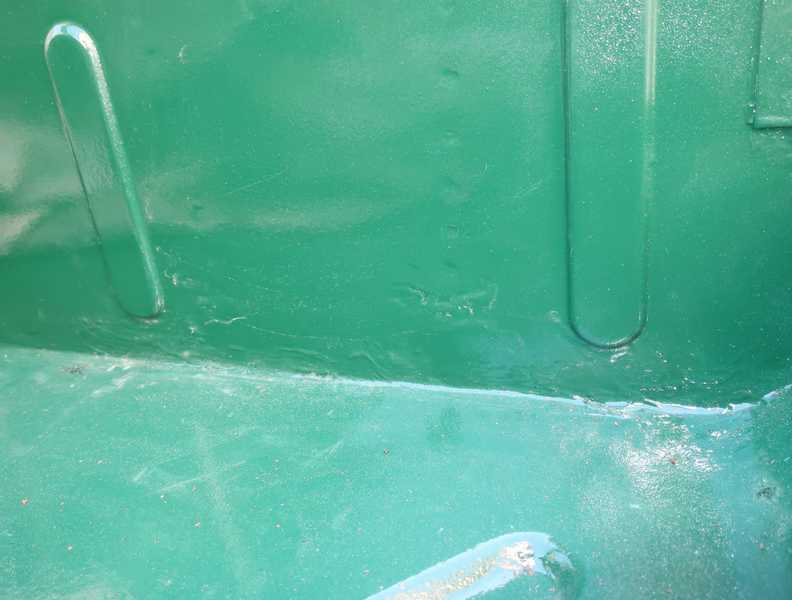
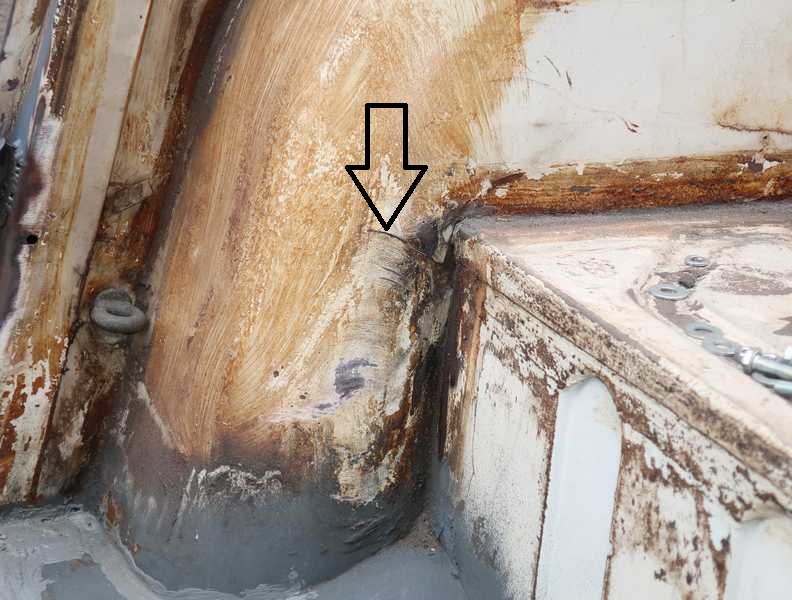
Rear Fender Seam
I found a small rust area along the forward edge of the right rear fender seam, a common rust area in TR4As and TR4s. I cut out the rusted parts and made a patch.
Below, the patch is welded into place with tack and plug welds. In the last picture, the welds have been ground down and the patch has a temporary coat of primer to prevent it from rusting.
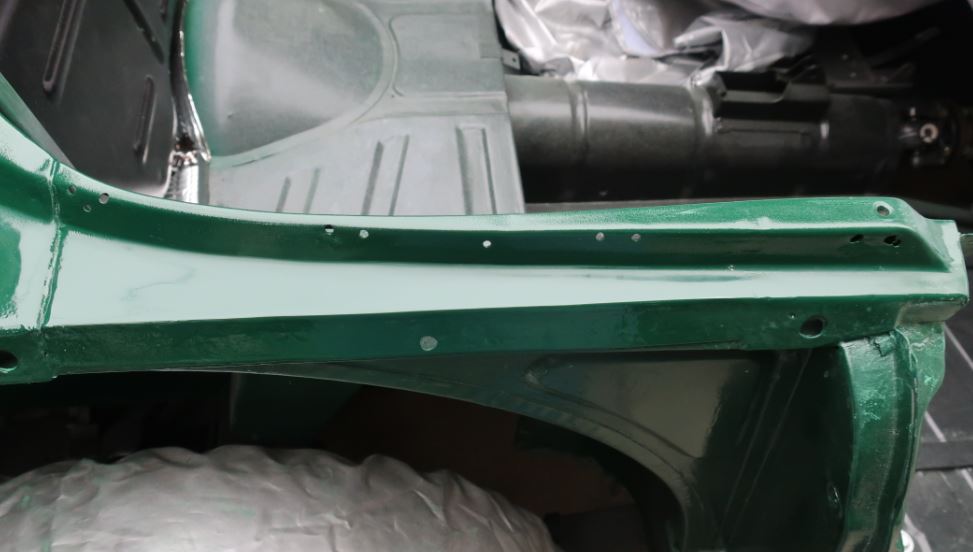
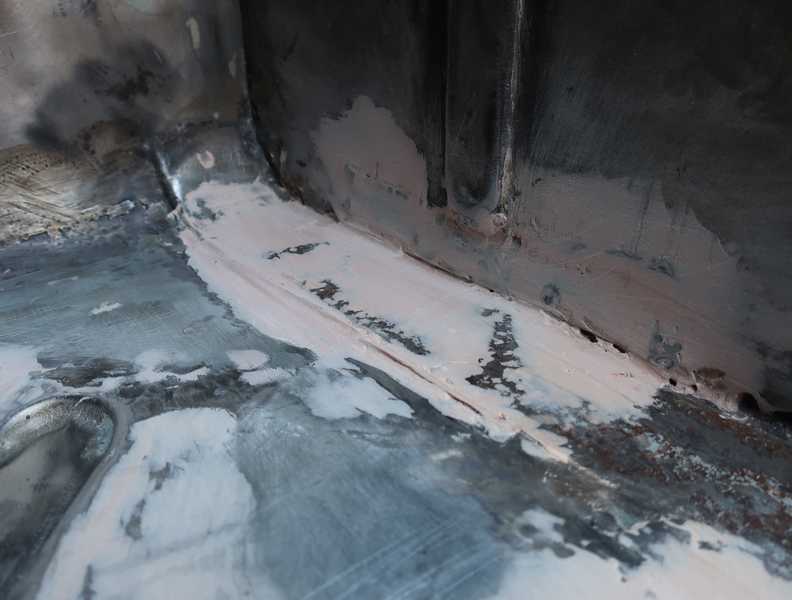
Somewhat later, the temporary primer was removed. The patch then received a smear of body filler, which was sanded smooth and epoxy-primed.
This was part of the car's rear deck, which subsequently received a couple coats of polyurethane primer. It was then sanded, painted, wet sanded, and polished. The finished section is shown below.
Another Rust Area in the Spare-Tire Well
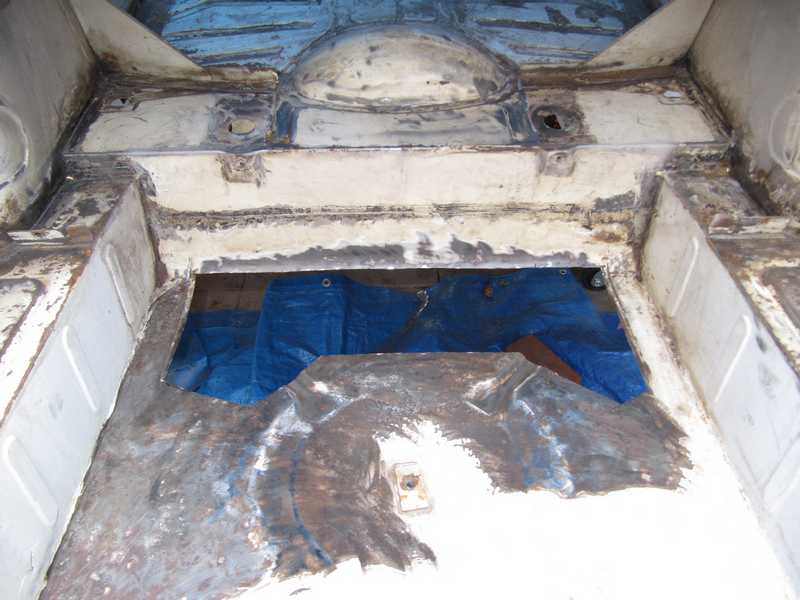
After removing the paint from the inside of the spare-tire well, and removing the undercoat from the outside, I discovered some rust-through along the right-side lower seam. The adjacent bottom piece was pitted, and I had decided to leave it as it was, but the holes in the sidewall clearly were not acceptable.
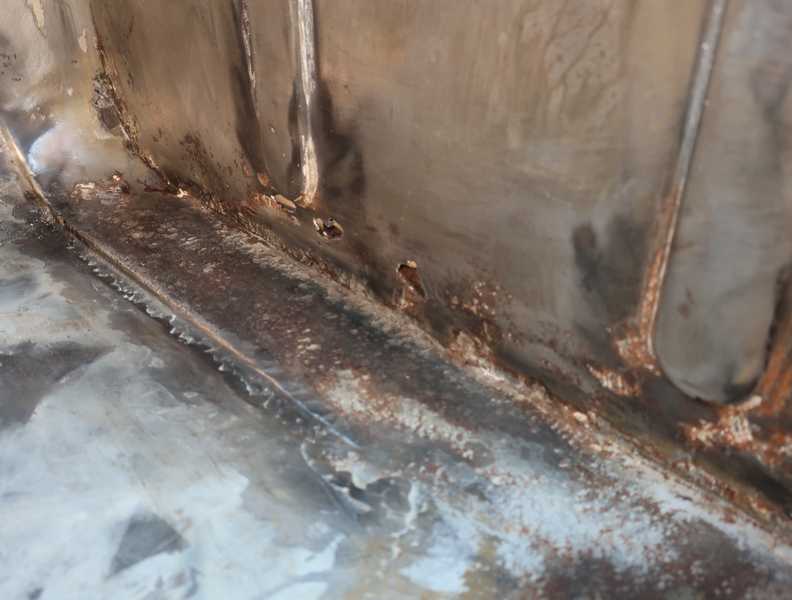
This repair required two patches: one for the side of the trunk well and one for the folded lip on the outside. I welded the patches from the outside, as it was more easily accessible for both welding and grinding.
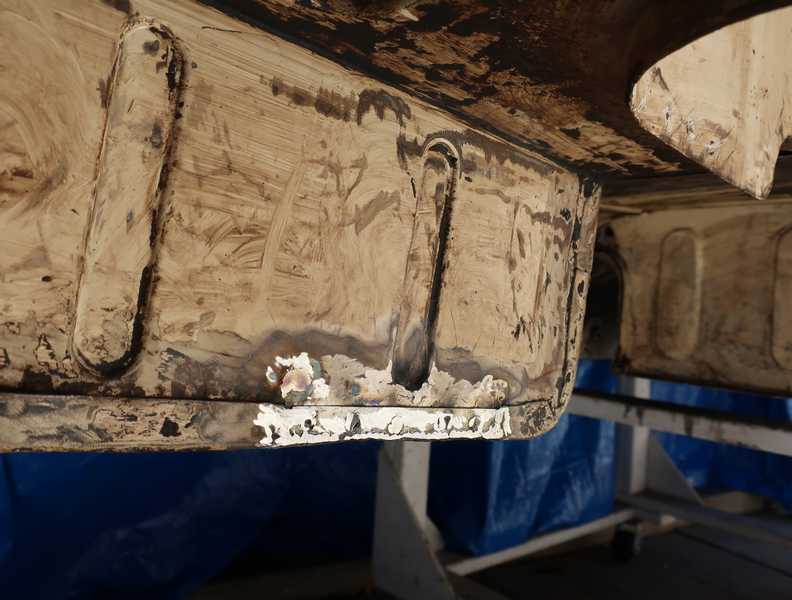
A little body filler smoothed out the patch on both sides.
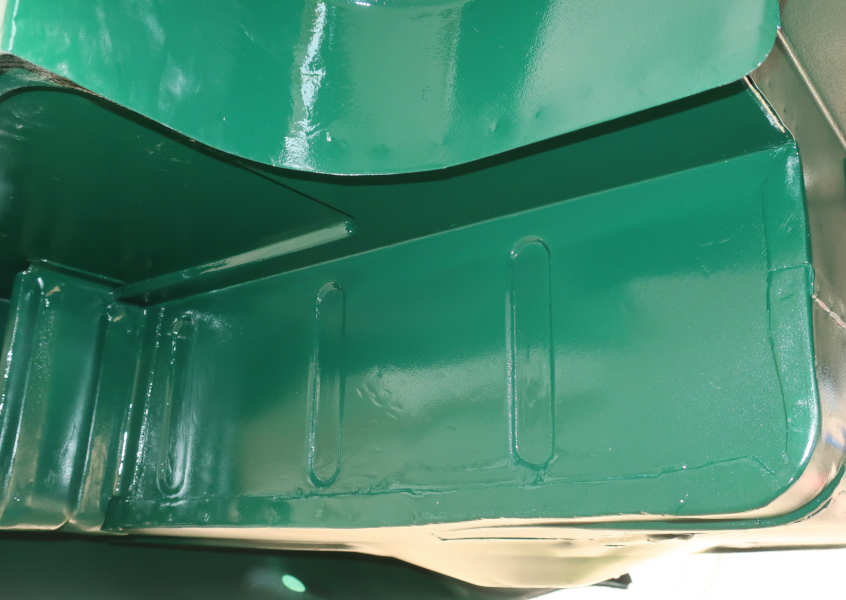
Here's what it looked like when finally painted. A decent repair, I think. Not invisible, but certainly inconspicuous. But who cares? It's just the trunk, after all.
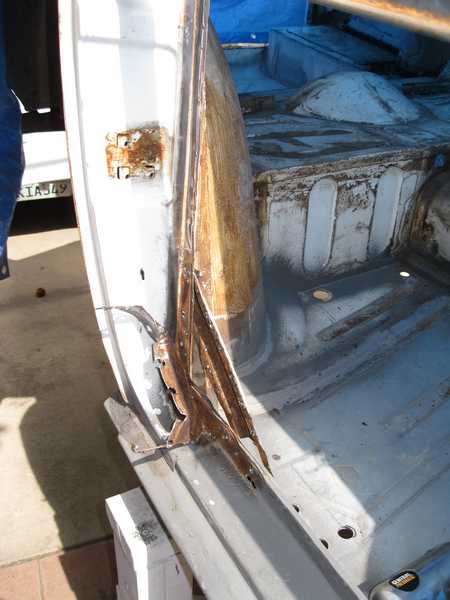
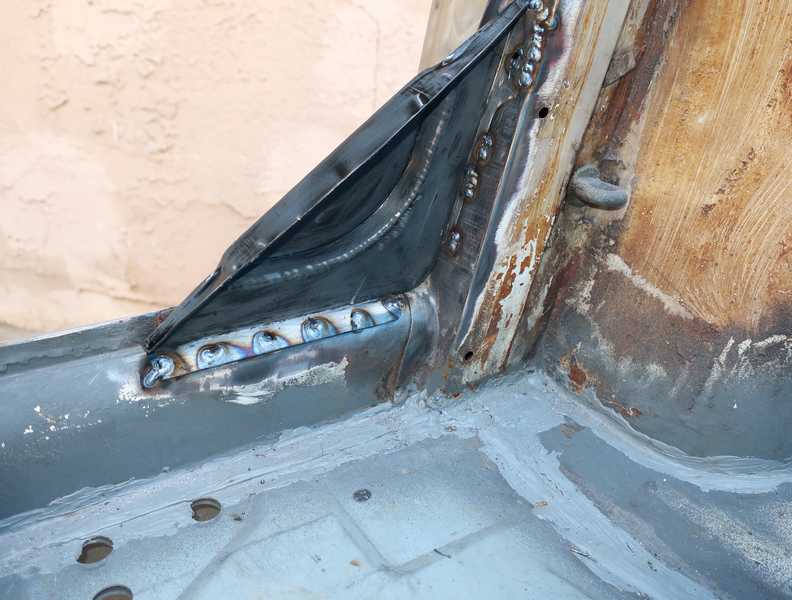
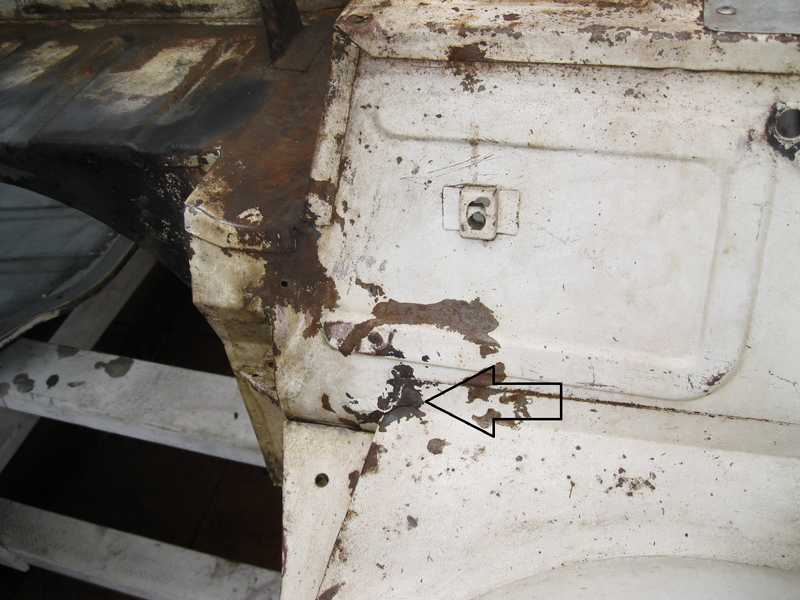
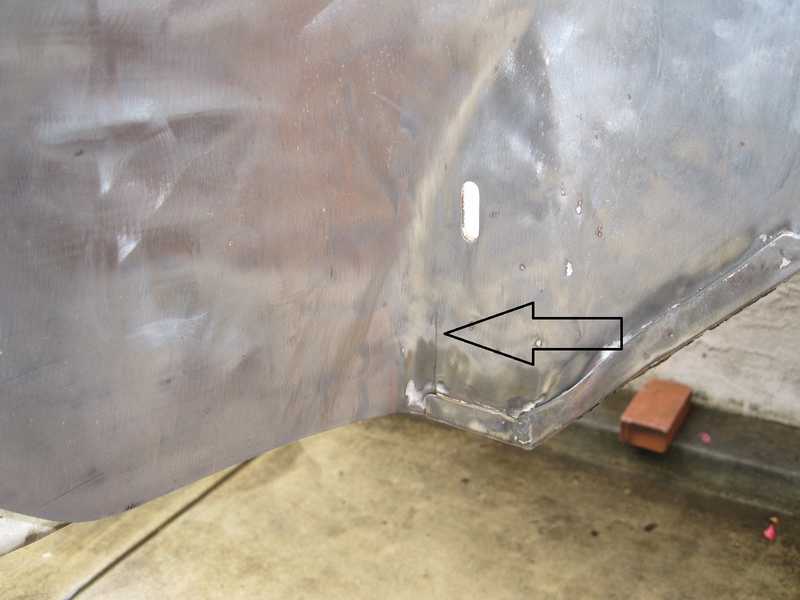
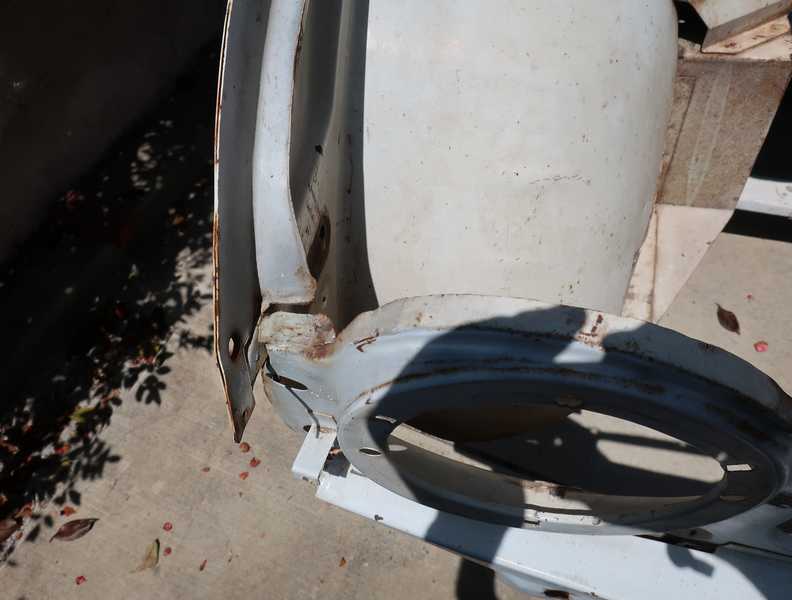
Door Gussets
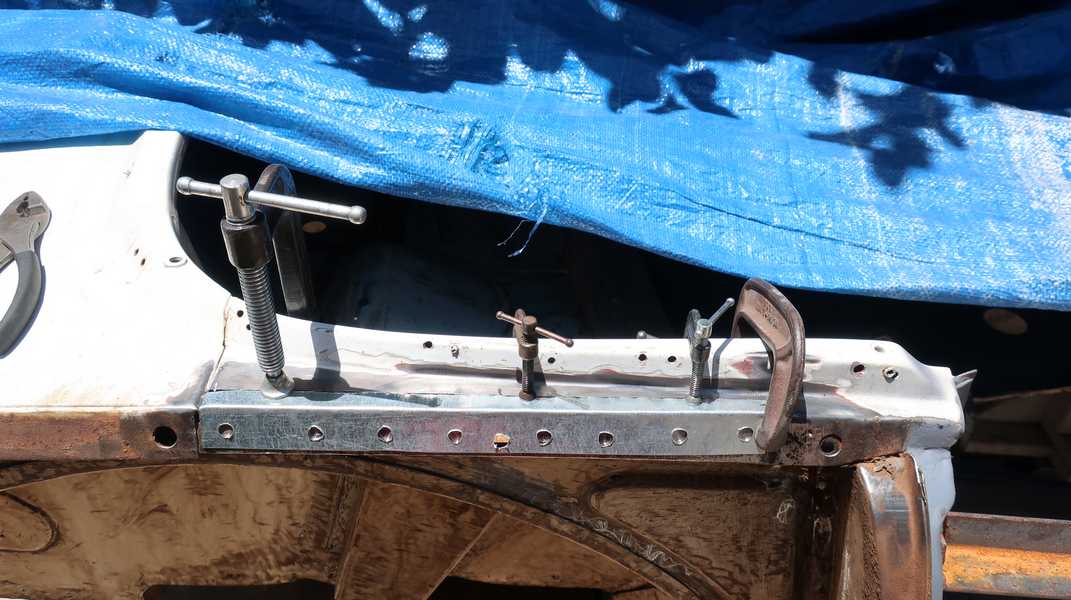
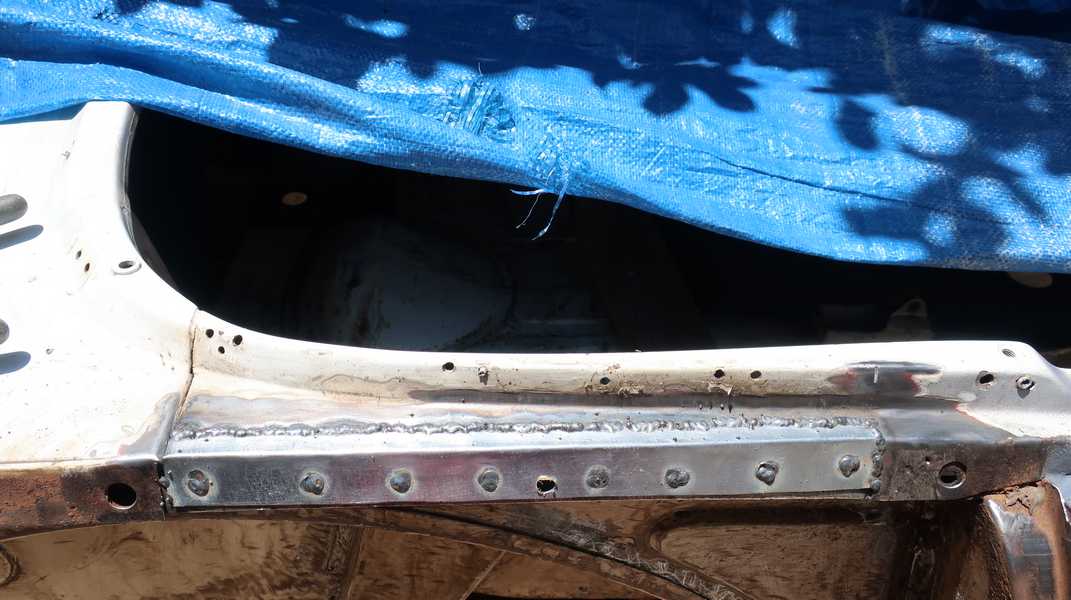
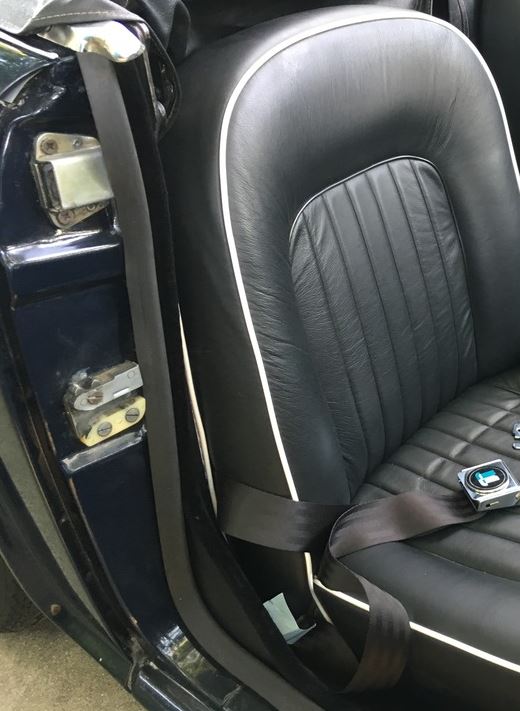
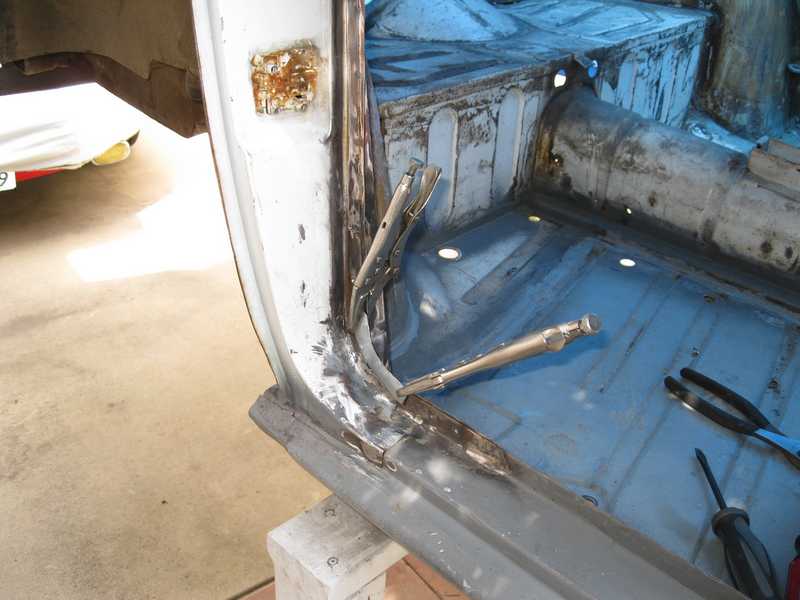
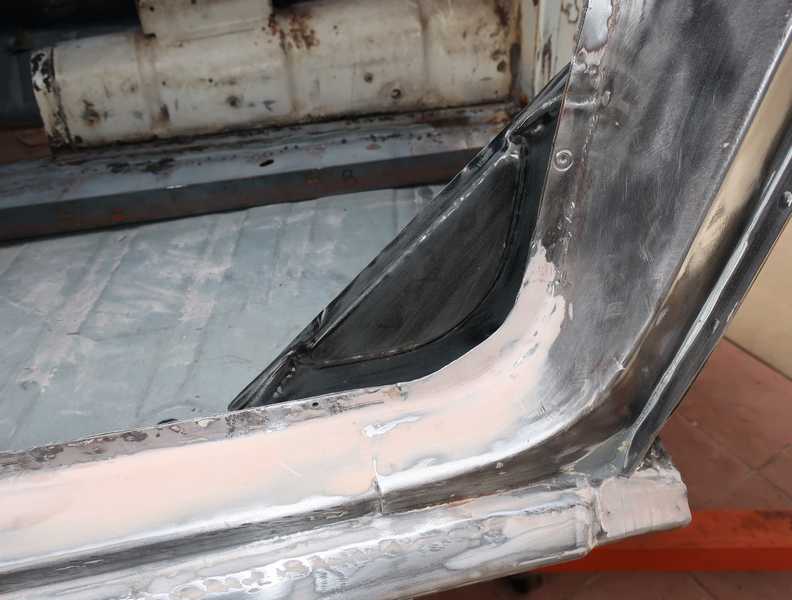
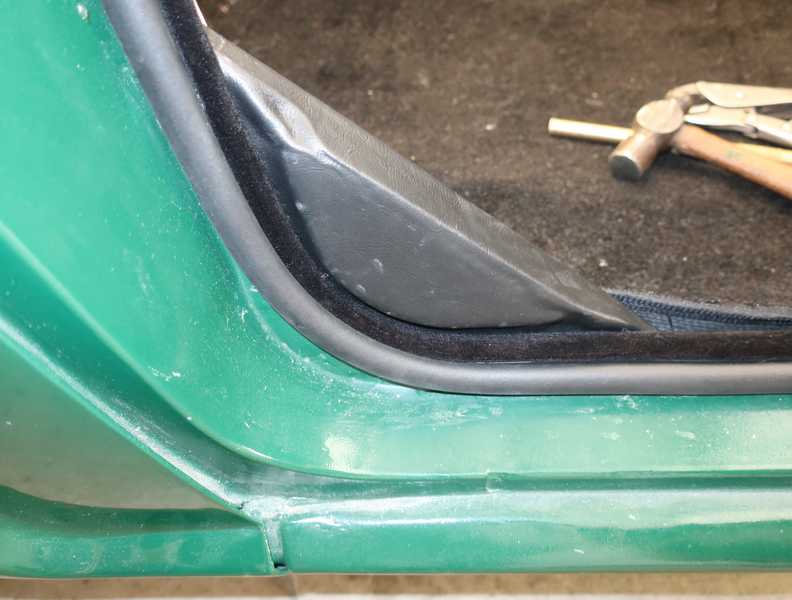
The original TR4 and 4A door seals used retaining strips, which were water traps. On my car, they had caused considerable rust in the door thresholds, and the retainers themselves were rusted beyond restoration. I removed them and used TR6 door seals, which are attached to the door flanges. Many who convert to the TR6 seals keep the original TR4A door gussets, but then the seals contact the door panels in the rear corners. To prevent that, I rebuilt the gussets and flanges so they were like TR6 ones and would seal against the door metal, as they should, not against the panel.
Below left is a picture of an original door seal. The second shows a TR6 seal applied to the original gusset. The door's metal sealing surface is only about an inch wide, so the TR6 seal will seal against the door panel, leaving a dirty line and allowing the lower rear corner to get wet in bad weather. You can find plenty of pictures like this; very few with the TR6 gusset, though.
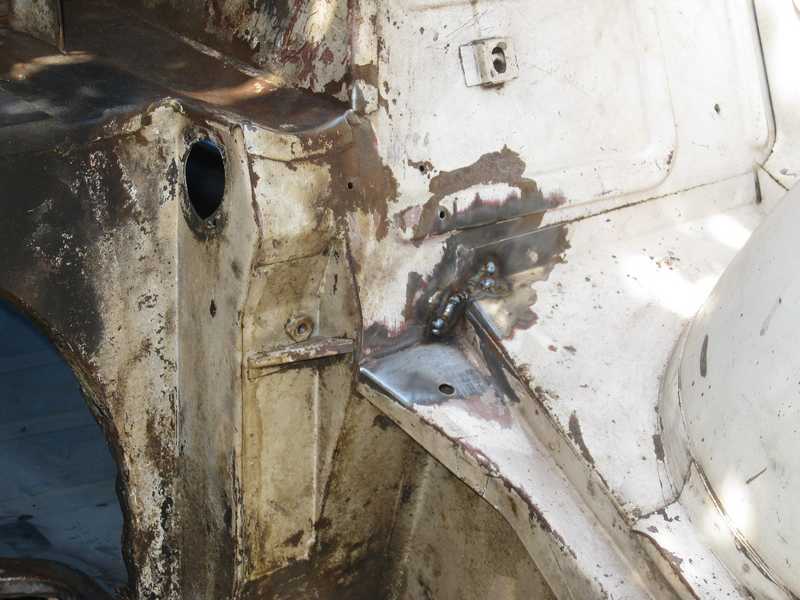
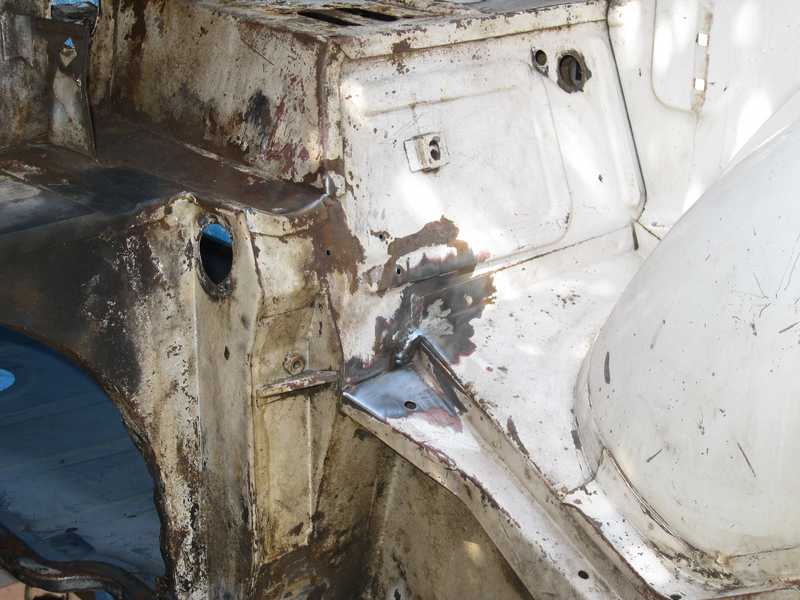
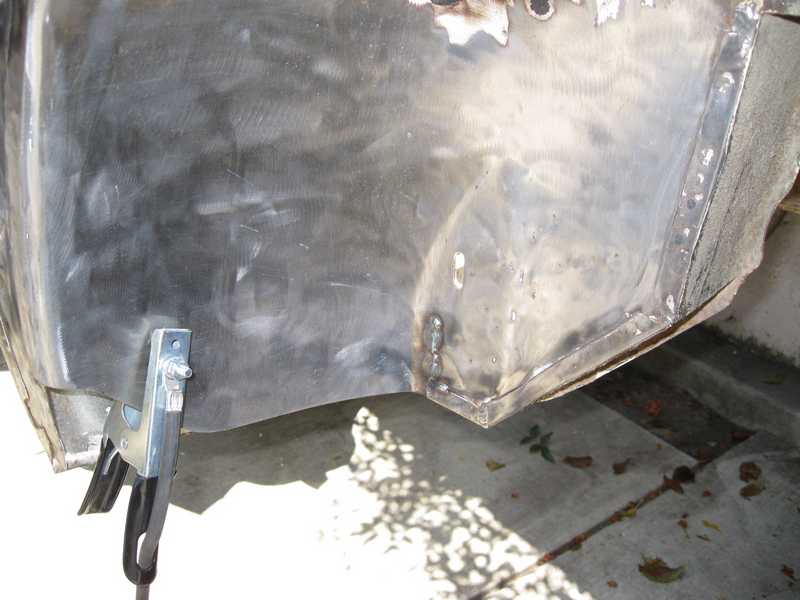
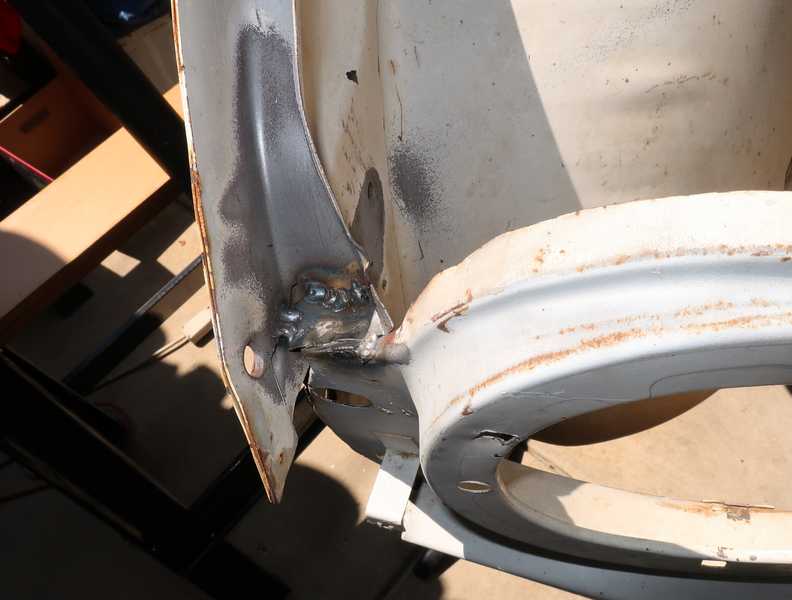
I began by removing the old seal retainers and drilling out the spot welds. Apparent conventional welds actually were brass brazed, but, in any case, I cut them too. Spot welds often were difficult to locate; the best way was to wire-brush off the paint and feel for the slight depressions left by the spot welder. Even then, I missed a few until I started to separate the gusset from the flanges.
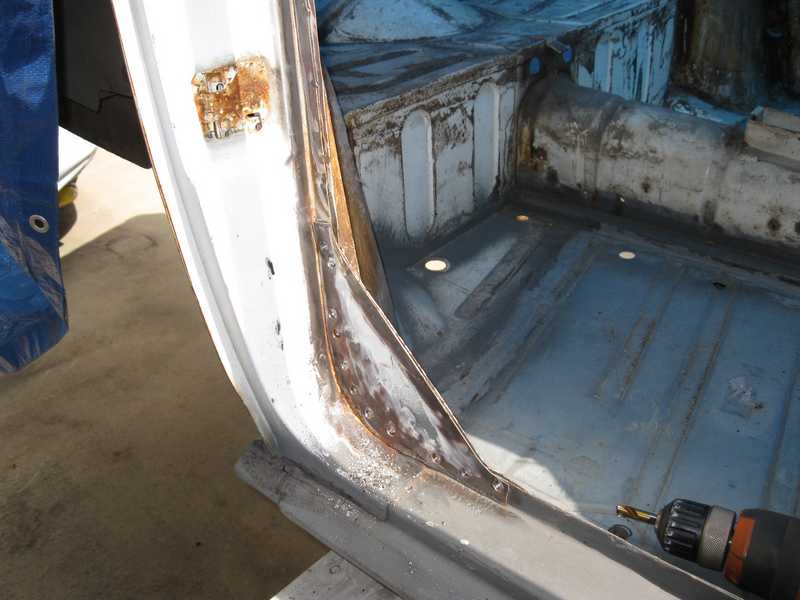
With a little work, and more spot-weld drilling, the panel came loose. I cleaned up the areas where the flange had received some rough treatment and welded it back together.
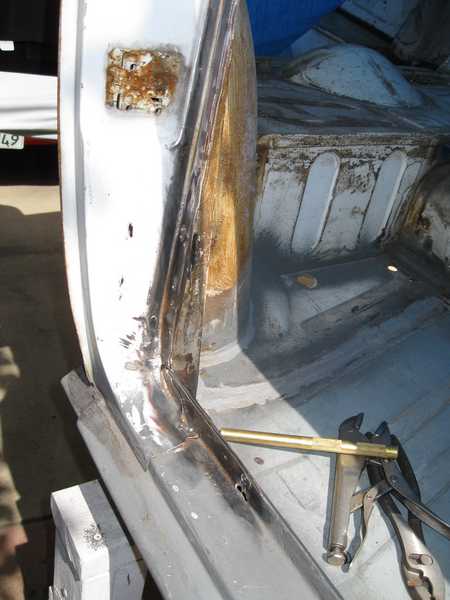
I welded in a curved piece of sheet steel, so the seal would follow the flange smoothly around the corner. I used only a few tack welds, as it really doesn't need any more. I smoothed it with body filler before painting.
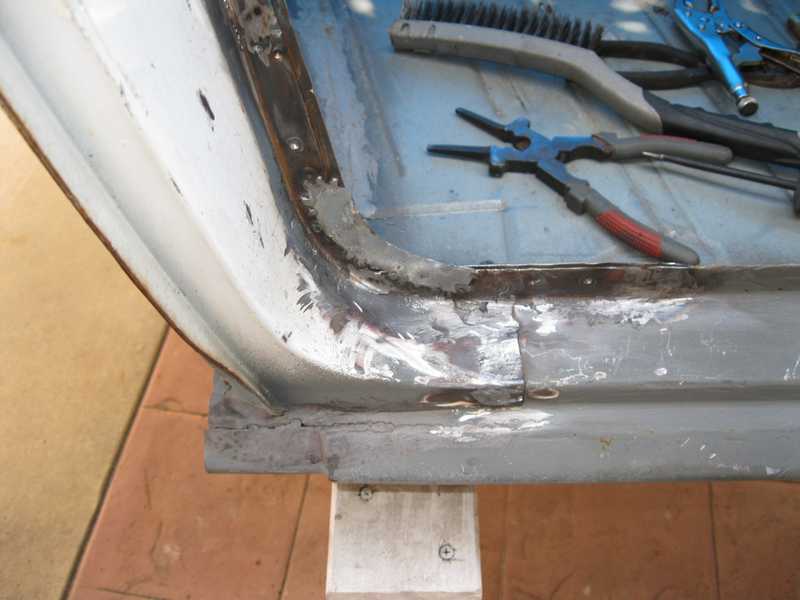
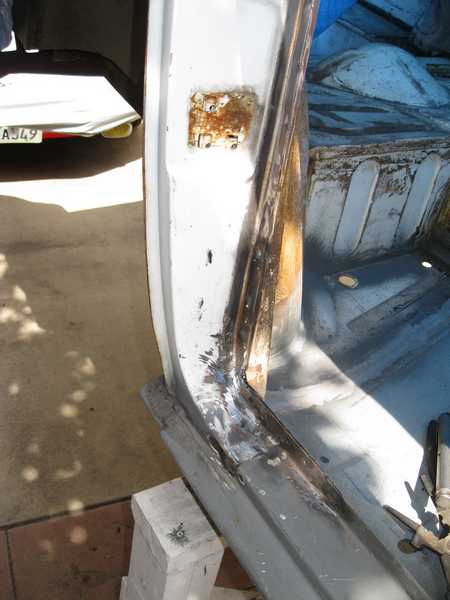
On the left side, I found a little rust under the rear door-seal retainer. I fixed it in the usual manner, then finished it as I did the right side.
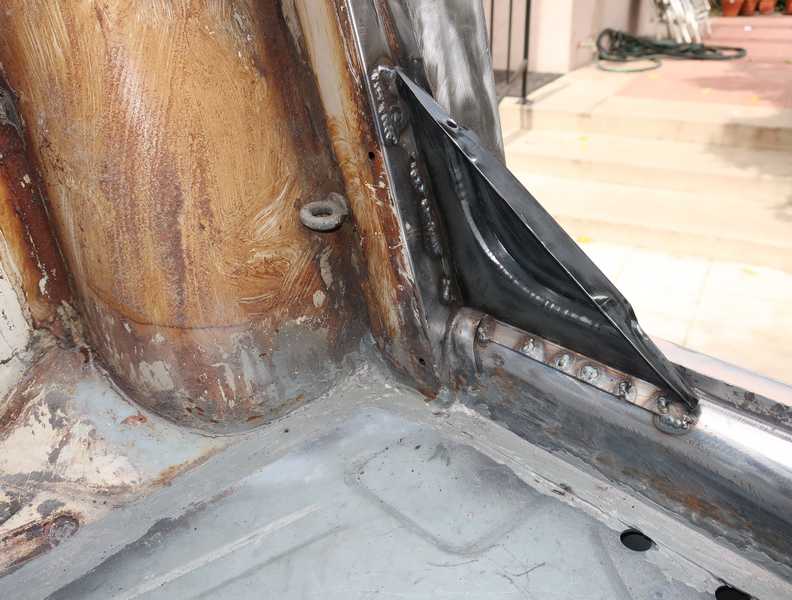
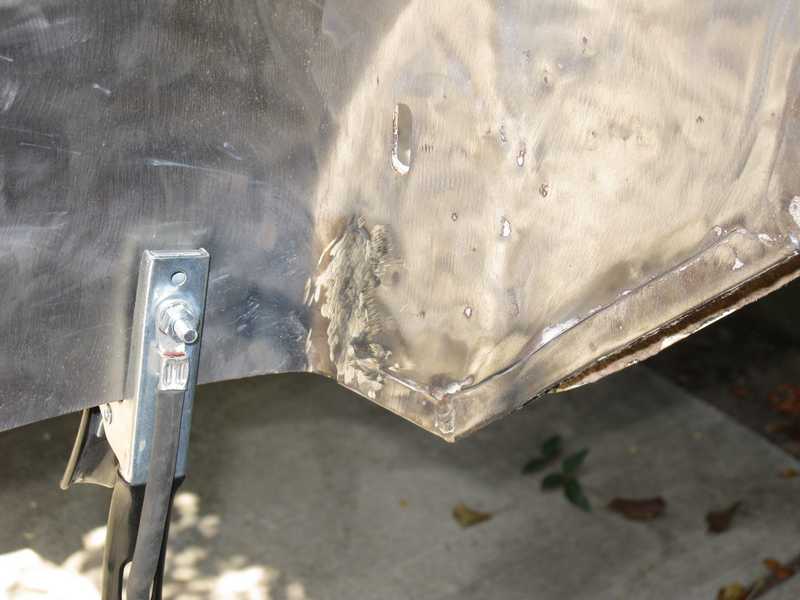
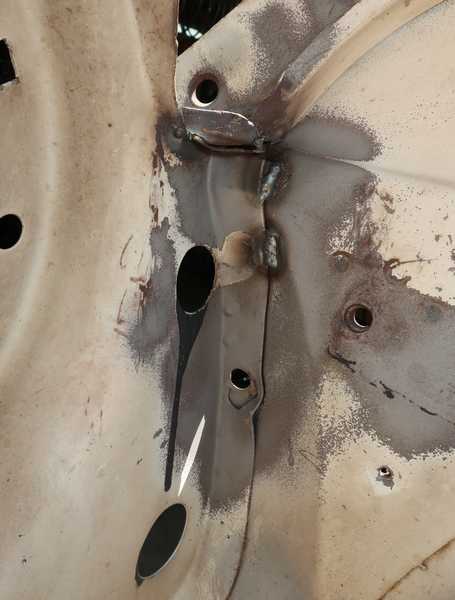
Below is a picture of the new type of gusset. It is a late TR6 part; early TR6s used a gusset similar to the TR4 one.
I sanded the gussets so primer would adhere, drilled them for plug welding, and removed paint where the gussets would be welded. I then welded them into place. I located the gussets 1/4 inch from the flange, using a 1/4-inch lathe tool as a spacer to set the position. That put the protruding, outer part of the gusset flush with the flange, which I expected to provide enough space to install the door gasket and to prevent interference with the door panel.
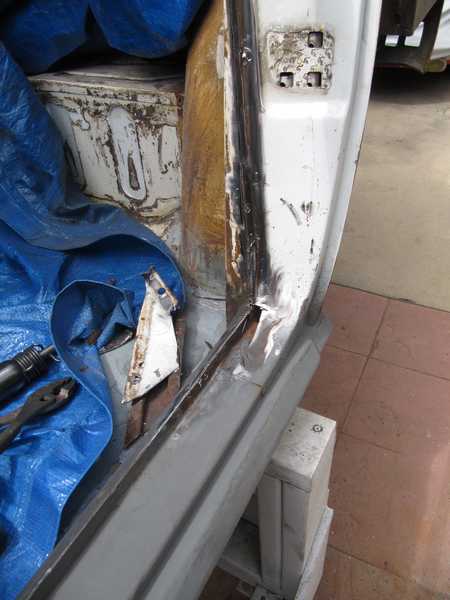
It was necessary to apply body filler to the flanges before installing the gussets, as the inward side of the flange would not be accessible afterwards. While welding, I had to be careful not to overheat the body filler.
The gussets required a lot of modification to fit even moderately well. If I were to do this again, I would consider exchanging the right- and left side gussets; I think they would fit better that way. Another option would be to make a gusset similar to the original one, but located inward from the flange. The early TR6s used such a gusset.
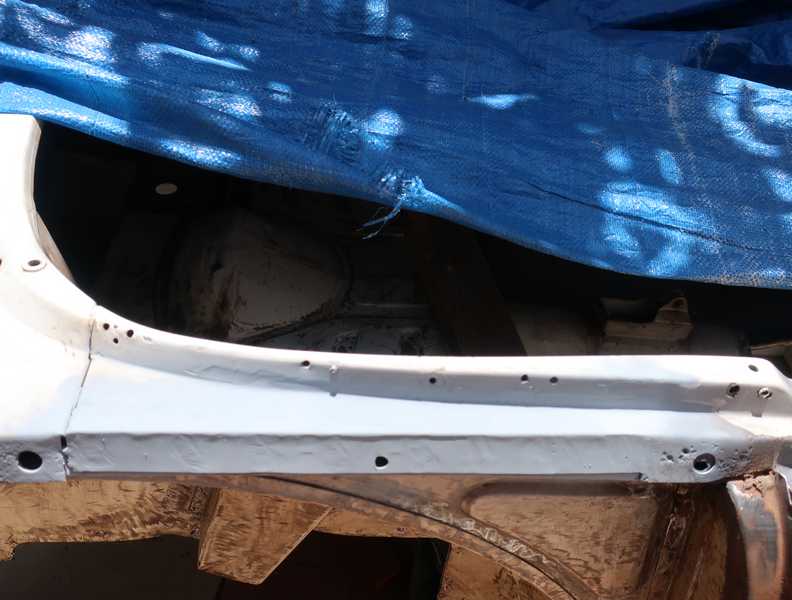
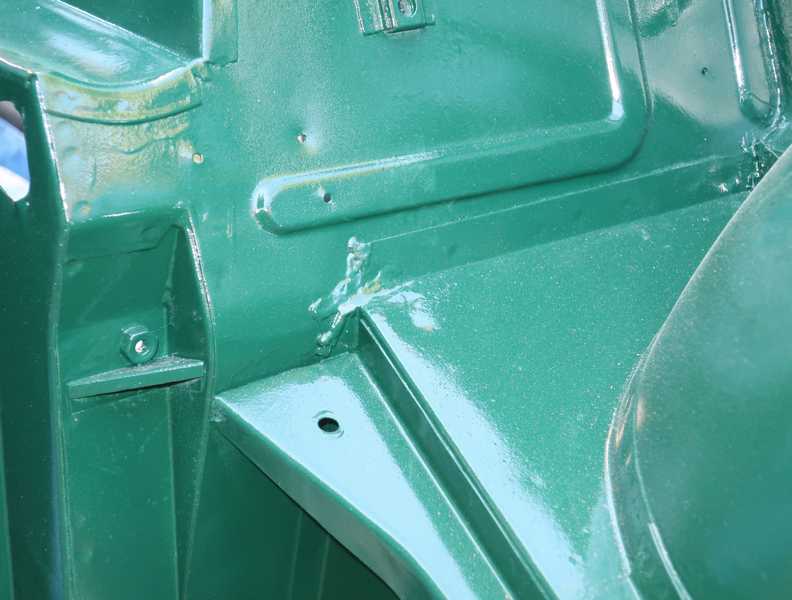
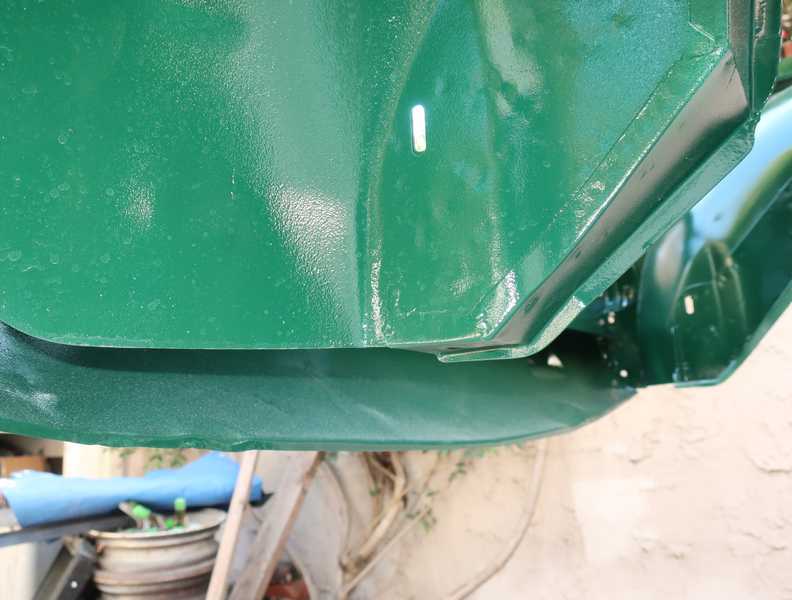
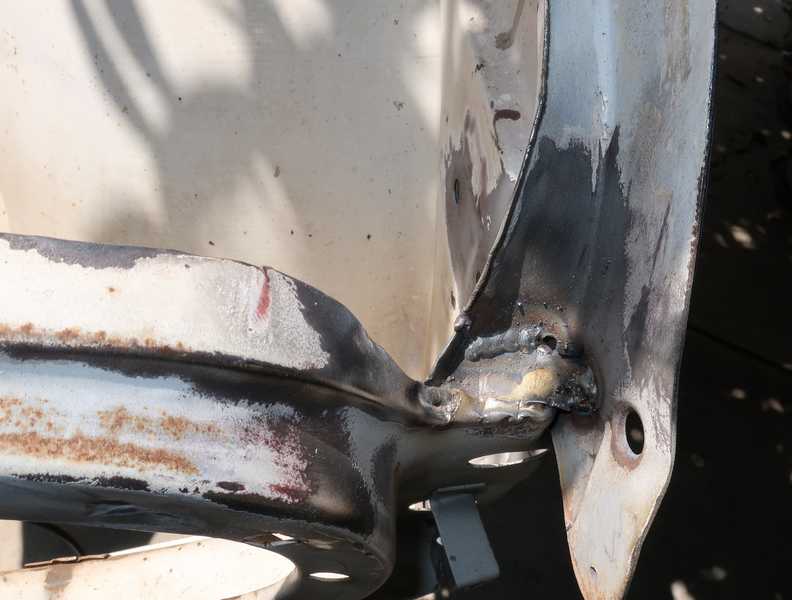
The gussets and modified flanges, ready for paint, are shown below.
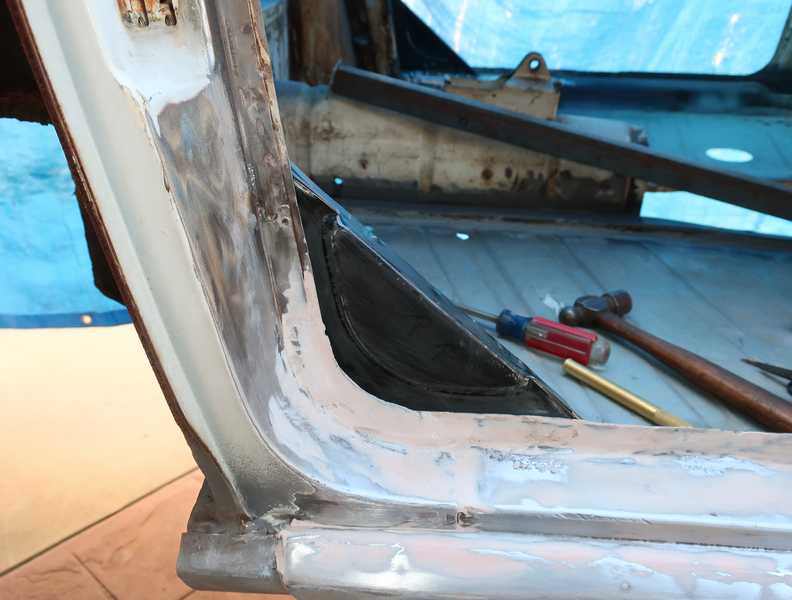
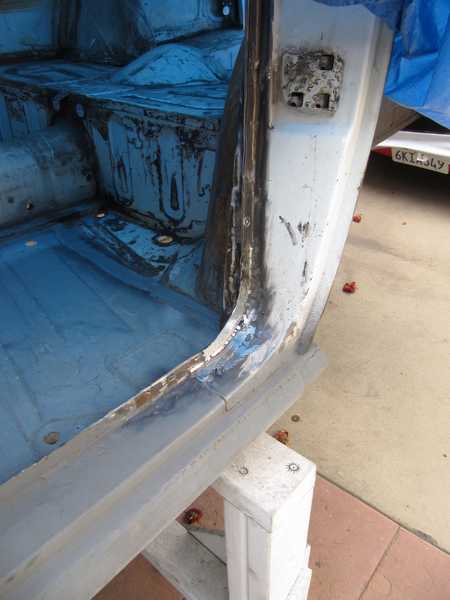
And, finally, painted.
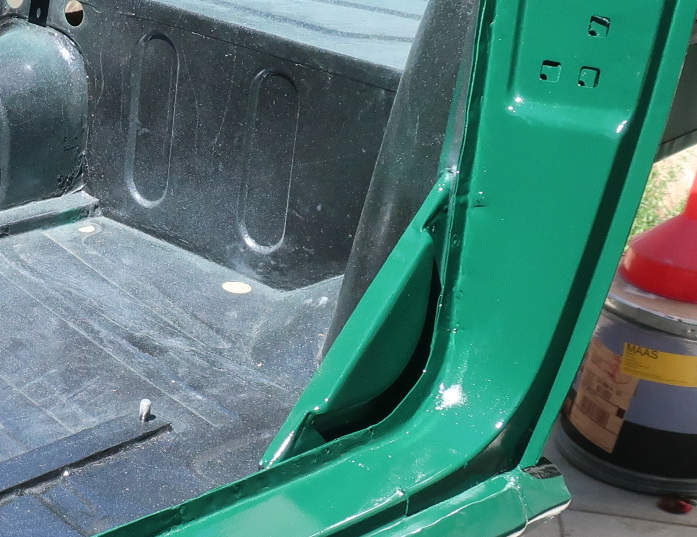
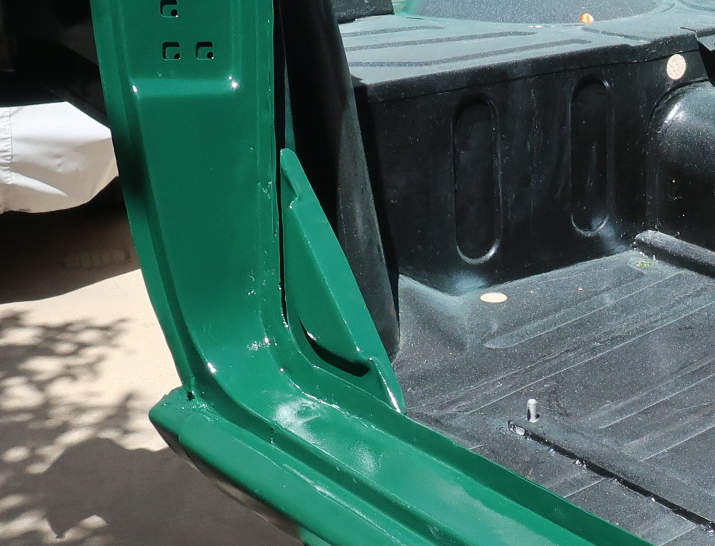
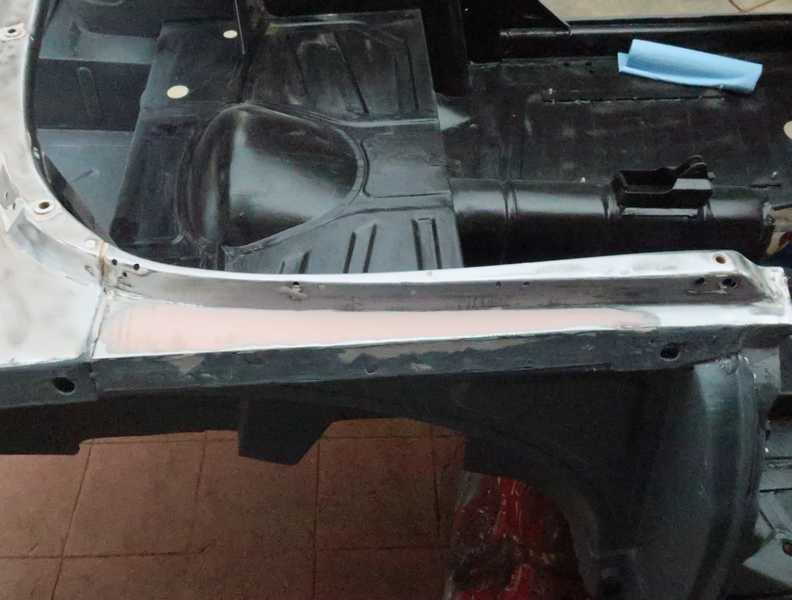
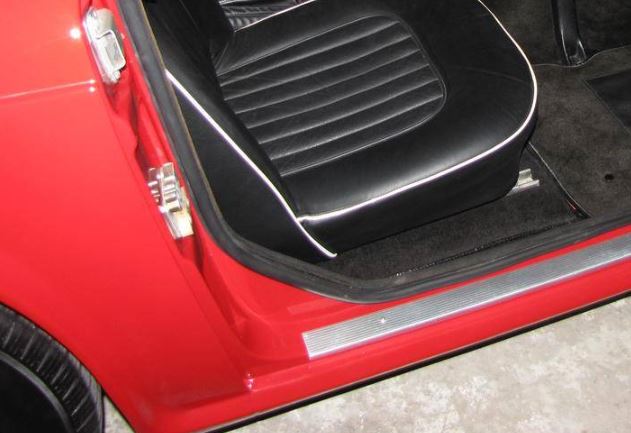
Much later, here's how it turned out. I had been concerned that the seal might not fit the flange's curve, so I had made it fairly gradual, and I didn't worry much about the flange's straight parts. As as result, there was just barely room to install the door seal. Making the flange a little narrower overall, even 1/8 inch, would have made the seal installation easier. In fact, the seal can handle a fairly tight curve, so my worry about it may have been unnecessary.
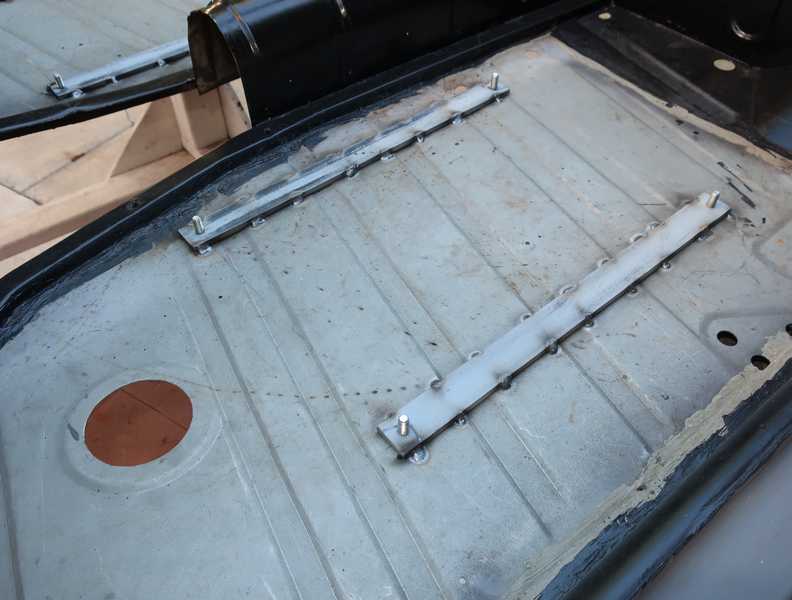
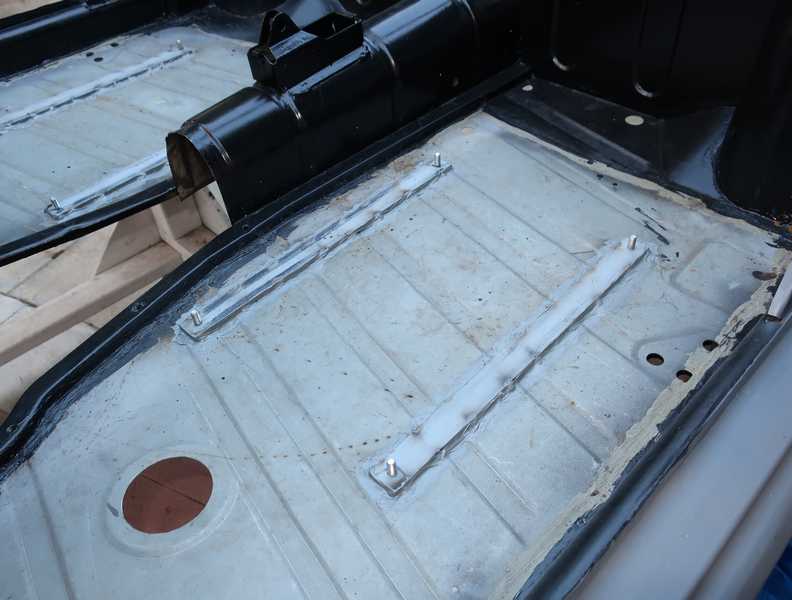
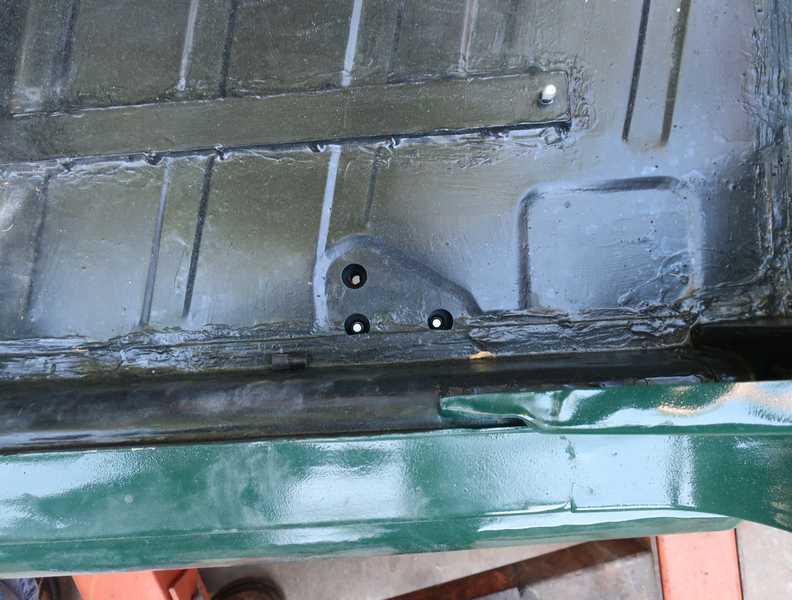
Seat Mounts
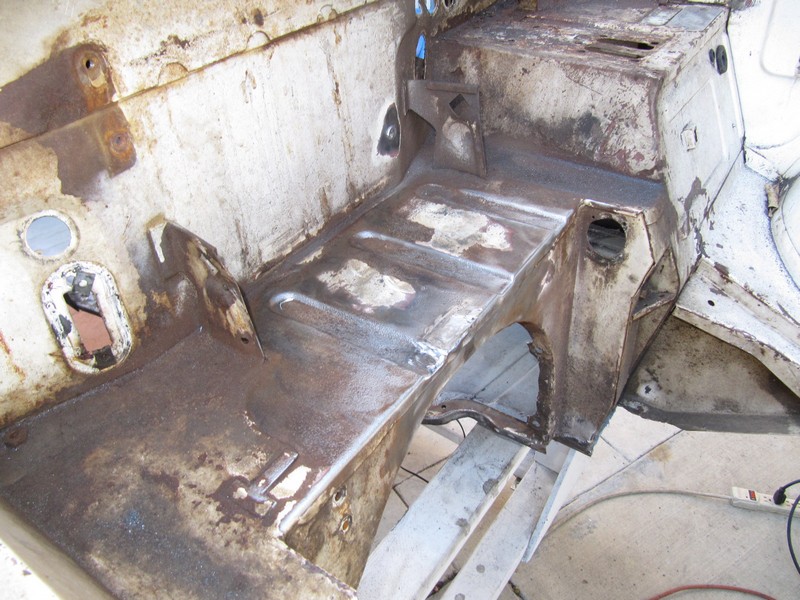
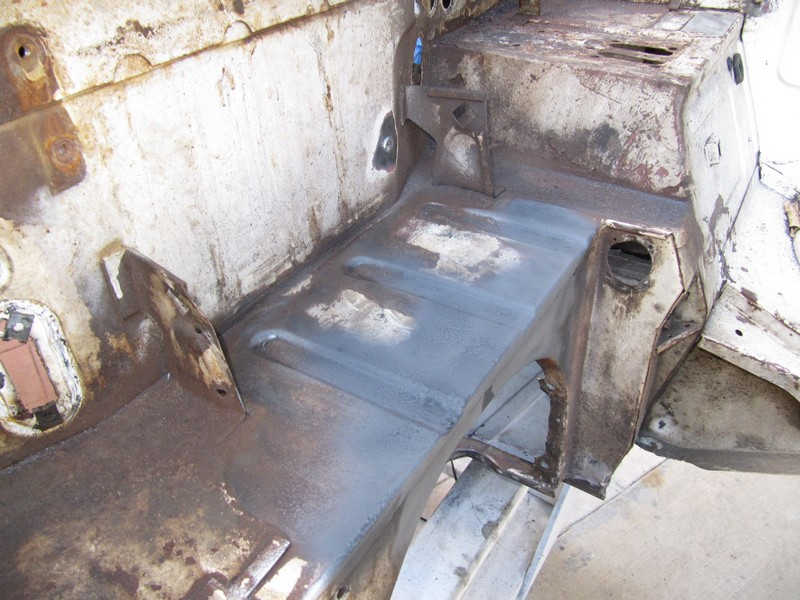
In the TR4A, the seat rails are bolted to nuts welded to reinforcing plates on the underside of the floor. Some of those nuts have to fit into openings in the frame. The floors I bought did not include those, and it is almost impossible to locate them accurately enough to guarantee that they will fit into the frame holes; if they don't, you're in a mell of a hess. Instead, I made mounts from 1/4-inch steel bar, with protruding studs, and welded them to the floor. This had the added advantage of stiffening the floor a bit. It didn't raise the seats, compared to the original design, because the latter included spacers to create room for the carpets.
Earlier, I had measured the locations of the seat mounts and recorded them in my project notebook. I marked those positions on the new floor and located the mounts on the floor. I used the seat slides to make sure they were parallel and the right distance apart before tack-welding them into place.
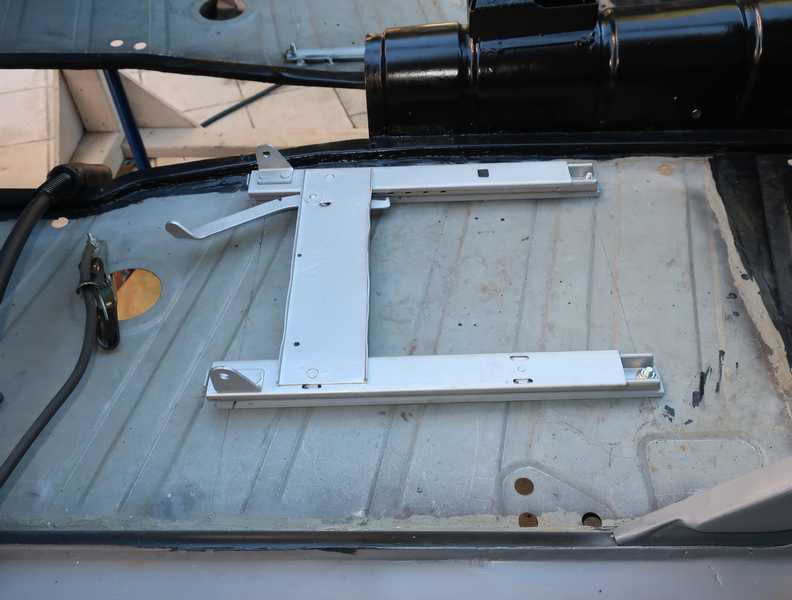
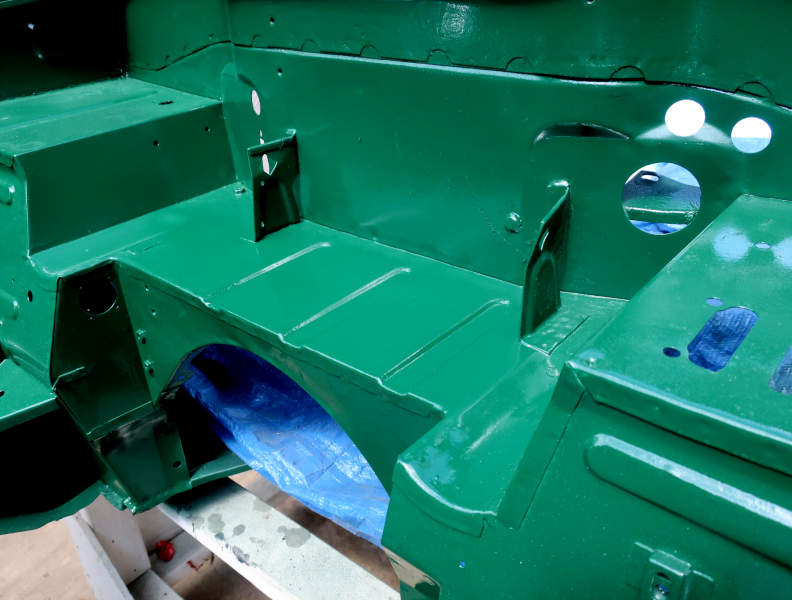
To avoid warping the floor, I welded the mounts with a number of short welds, not continuous ones. Finally, I applied body sealer to prevent water from getting trapped under the mount, should any leak in. Once the mounts were in place, I painted the floor with rust-resistant paint.
The mounting studs, by the way, were welded to the undersides of the steel bars. I drilled and tapped the holes and countersank them to provide room for filler metal. Each stud was long enough only for a nut and washer to secure the seat; longer and it would have interfered with seat movement. After welding, I ground the surfaces flat and gave the bars a heavy coat of weld-though primer. The seat slides and rails had been cleaned, derusted, and painted with aluminum paint.
Body Cracks
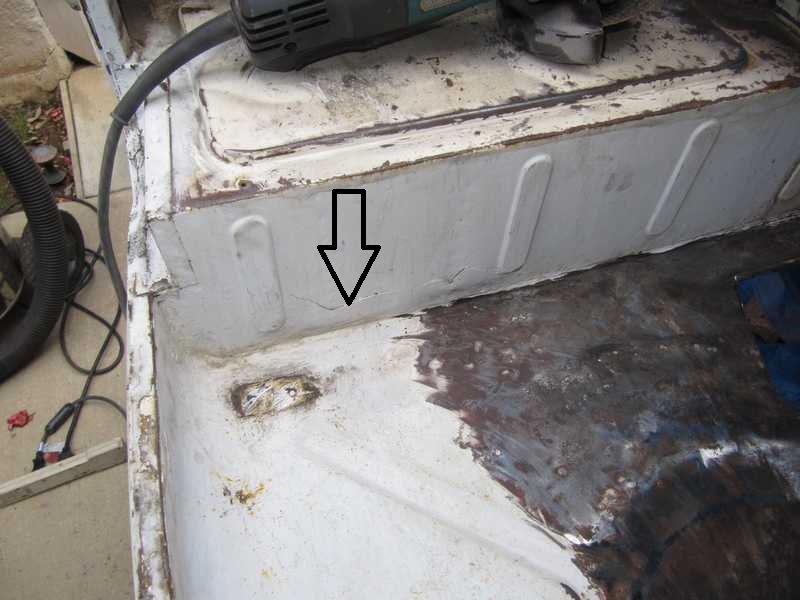
I found a few fatigue cracks in the body. The cracks were no big deal, as I could tap the metal back into place and weld it. I've never seen fatigue cracks in a body before, but I doubt that it is unusual, especially in a car that's a half-century old.
I found cracks on both sides of the spare-tire well. Here's the left side; the right wasn't as bad.
Below, the fatigue cracks in the sides of the tire well have been welded and the welds ground flat. In these pictures, the camera made the ground-down welds look especially ugly, but visually they looked fine.
Finished and painted.
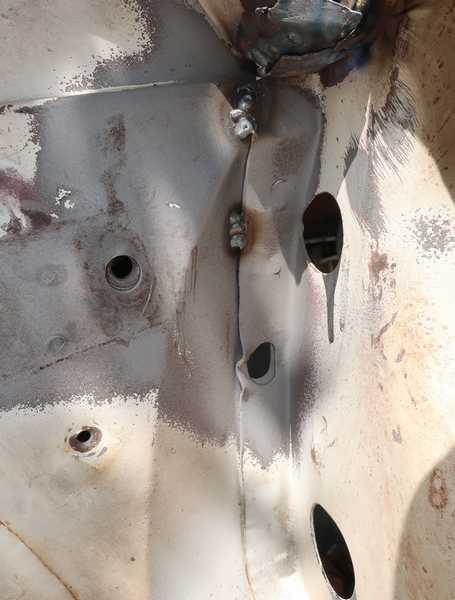
Below, a crack in the firewall behind the left front wheel well.
As with the others, I welded it and ground the weld flat. I couldn't reach the lower part of the weld with the grinder, so it will just have to stay as is.
Here it is, finished.
Here is another one in the left front wheel well. It was not visible until I took off the undercoat and paint.
It seems to have started at the end of that edge seam, a place where there is an abrupt change in the metal thickness, so it can fatigue easily. To prevent further fatigue, I welded the end of the seam and closed the start of the crack completely.
The repaired crack in the finished body.
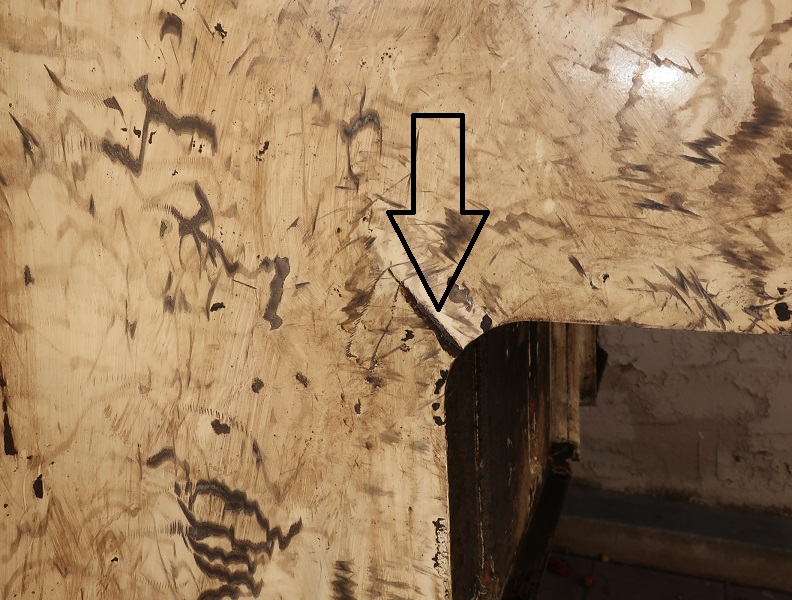
I found a large crack toward the front of the right rear wheel well. I could see this one from outside even before I removed the undercoat.
Same repair as the others: weld it and grind the weld flat.
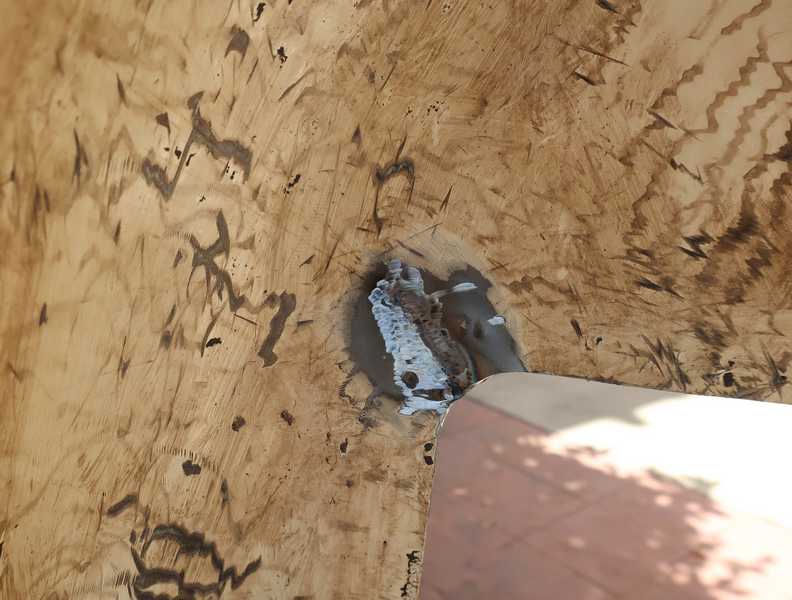
Later, I found a matching crack on the left side. This view is from outside the car, with the undercoat removed.
Below, the repair. I tapped the metal back into place with a body hammer, welded it, and ground the weld flat.

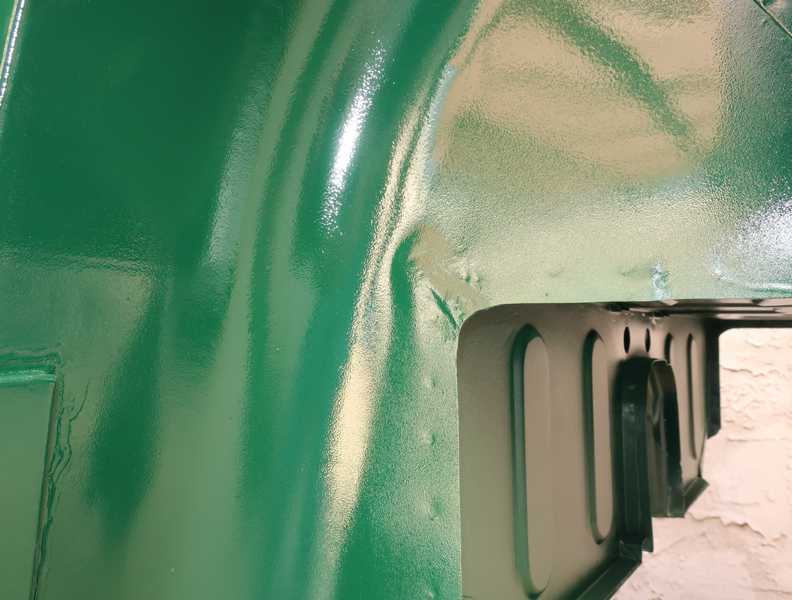
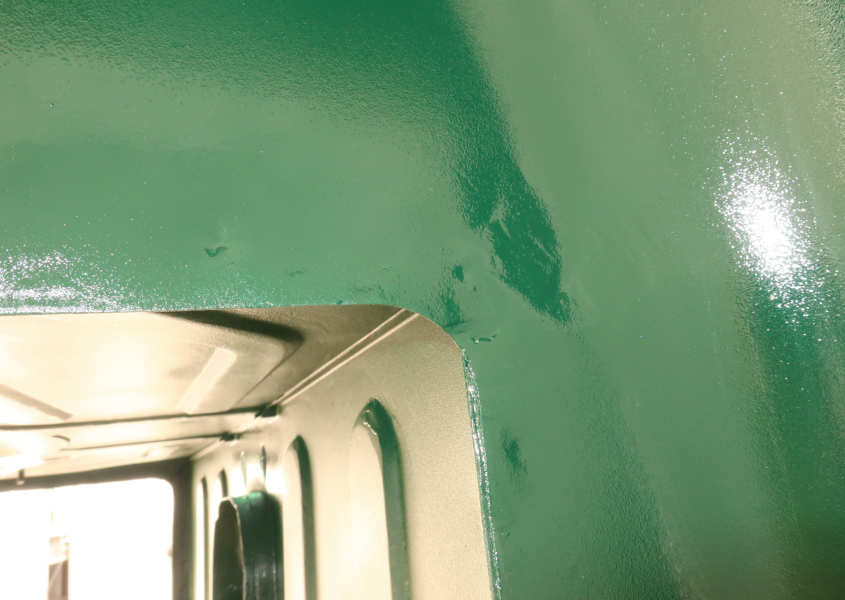
Here are rear wheel wells' repaired cracks, after the body was painted.
I have subsequently learned that body cracks in these corners are very common. Some people add reinforcing plates to the inside of the body where they occur, but it's possible that such plates might just move the crack location to the plate edges.
A lot happened between the repairs shown in this section and the finished, painted body. See the Paint page for all that.
Minor Repairs
Threaded Post
The inside of the firewall has a threaded post, used for the heater. The threads on that post had rusted off, so it had to be replaced. I ground it off from the engine side and replaced it with a modified quarter-inch bolt. It was welded only on the outside.
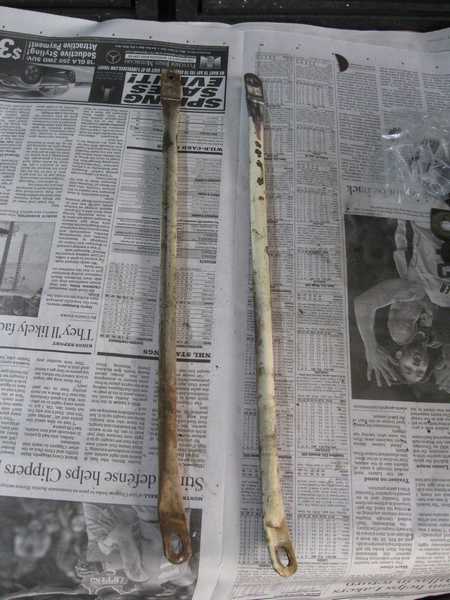
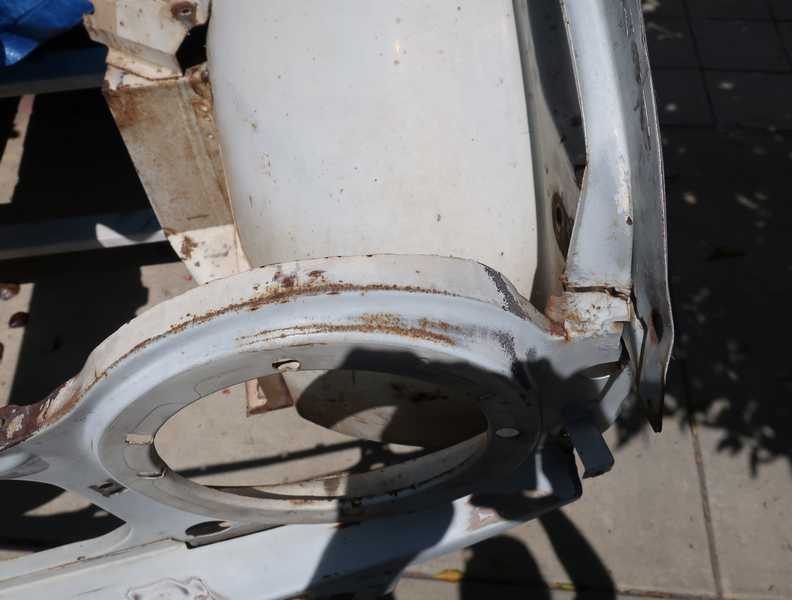
Grille Stays
The grille support panel obviously had suffered a minor mishap. It was pushed inward almost an inch, and the two stays that support the grille were bent. I had to readjust the support and weld both stays' outer flanges, which had cracked when I straightened them.
In the first picture, below, the stays are straightened but not welded; in the second, they have been welded and cleaned.
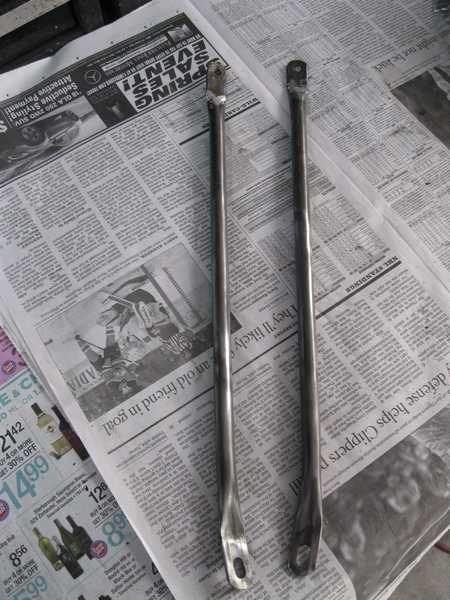
I used the stays (now primed) as tools to check the support's position as I bent it back into shape. It's important to get it right, as it affects the headlights' aim.
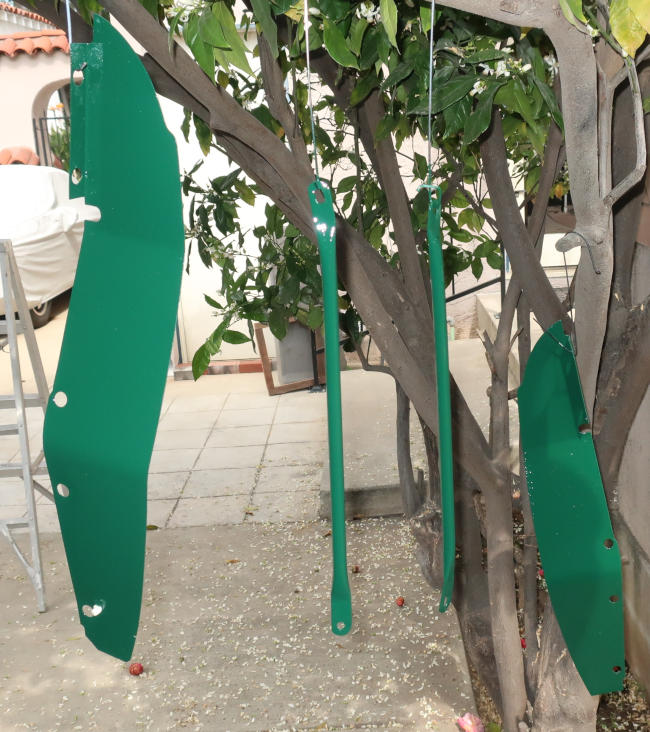
Here are the stays, painted and hung on the orange tree to dry. The larger pieces, painted at the same time, cover the rear part of the front wheel wells.
And, finally, mounted on the car. (The horns shown in the picture were replaced before the restoration was completed. See the Electrics page for details.)
Engine Compartment Gutters
This is a little strange. The gutters that surround the engine compartment were separated from the grille-support panel. Burrs on the undersides showed that both sides had been cut at some point; they were not fatigued. The grille support's spot welds seemed undisturbed, so I don't think it had ever been replaced. Why were the gutters cut? Perhaps during repair of yet another incident. Indeed, body filler in the front valence showed that it had been damaged at some point. Beyond that, I have no idea. Just one of the odd things you find in an old car.
I used media blasting to remove the paint in the joint, as it was not reachable by an angle grinder with a wire brush. I welded the joint and added a couple welds to the side of the panel, where I thought it needed a stronger, more stable attachment to the inside fender.
The repair created a minor water trap, so I coated it with a little body filler before priming it.
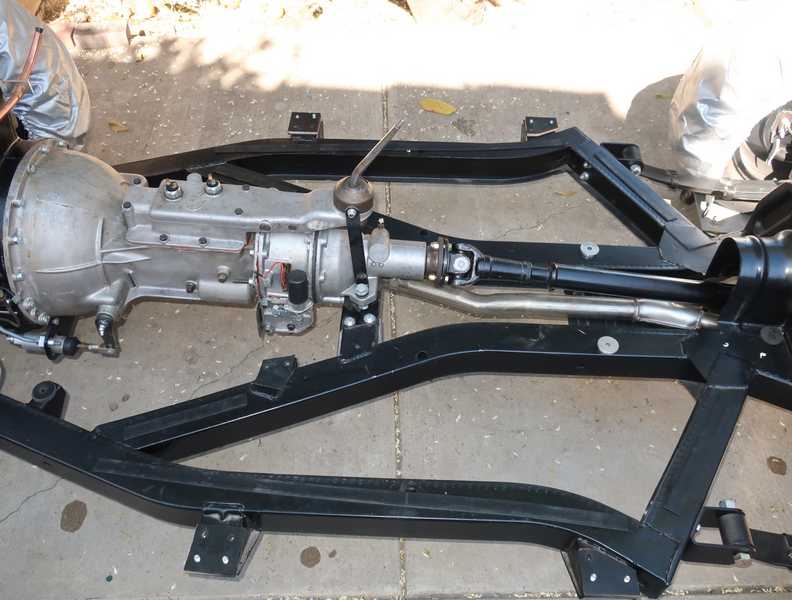
Body Reinstallation
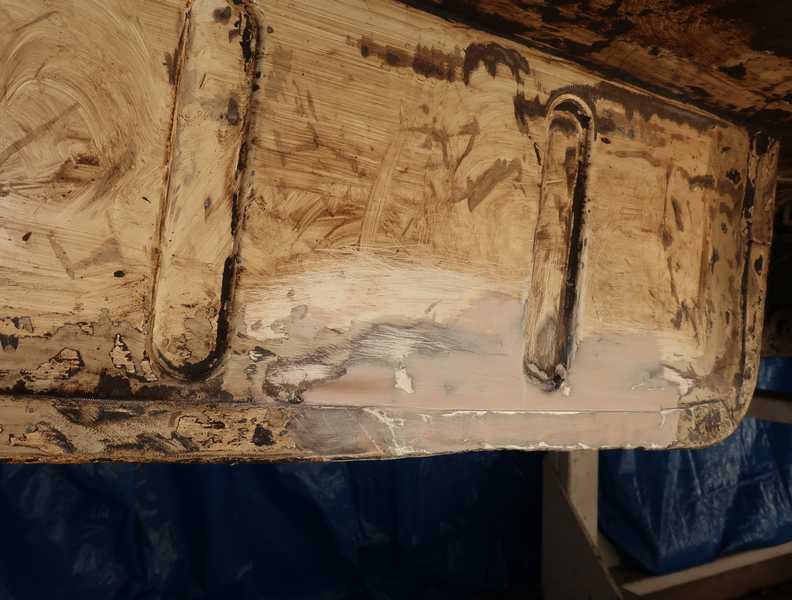
Once the main part of the body was painted, it was time to put it back on the chassis. The original spacers were worn out, so I needed to buy or make new ones. Per my experience with similar parts, I expected the purchased ones to be a disappointment, so I made a bunch of spacers myself, shown below: phenolic and rubber pads for the large mounting feet, and round rubber and aluminum spacers. The small cylindrical object is a home-made punch for making holes in the rubber pieces.
![]()
The materials were sourced from McMaster-Carr. Some were left over from previous projects.
Originally, each large spacer consisted of 1/8-inch canvas-reinforced rubber bonded to a 1/8-inch steel plate. Each location had two of these, for 1/2-inch total thickness, but they were squashed to 0.4-0.45 inches over the years. My measurements of the frame and floor indicated that this should have been about 0.1 inch too much, but, somehow, it seemed to work. In any case, my new floors had different dimensions, so I had to measure and calculate the needed thicknesses, expecting that a certain amount of fine-tuning would be necessary. I planned to use one rubber piece at each location and to fill in the rest of the thickness with phenolic spacers.
To hold them in place, the rubber strips and spacers were installed with a drop or two of superglue. I didn't glue the large pads, as I expected them to need a little adjustment later. I don't understand why rubber strips are not used on the internal frame rails, but that's the way the factory designed the car, so I didn't use them. I decided that I could install some later, if it seemed to make sense. The logic for the use of hard and soft spacers likewise eludes me, but if I didn't install them the factory way, I figured, I'd probably learn why.
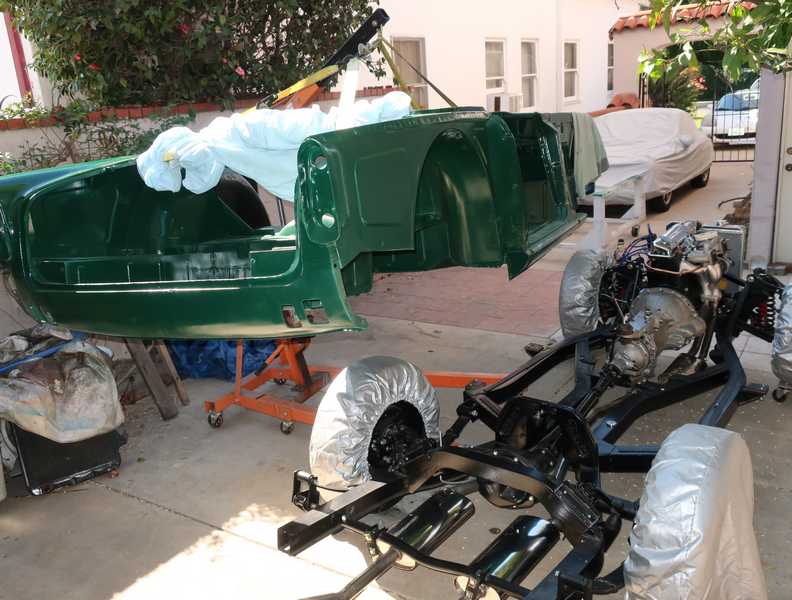
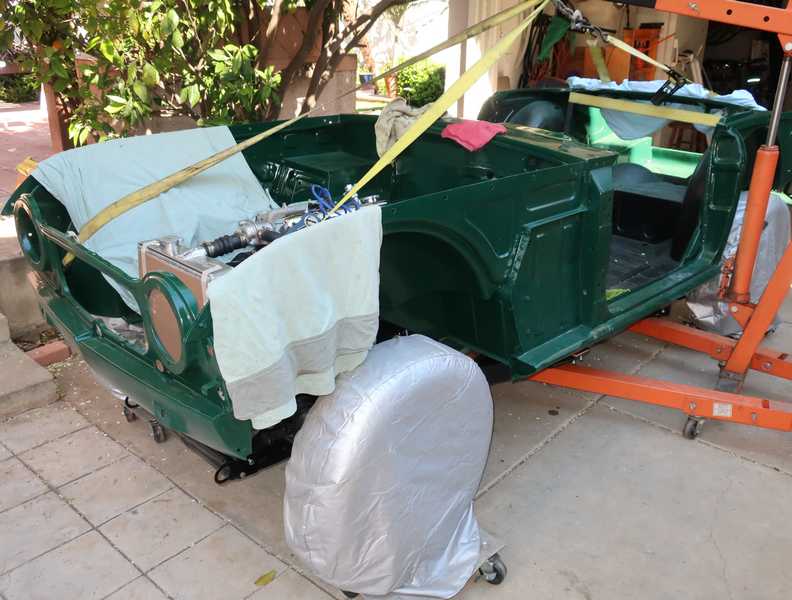
I lifted the body in much the same way as I removed it. Soft cloths protected the body where the straps contacted it, and covers protected my nice aluminum wheels. I never noticed, until I viewed these pictures, that I had forgotten to reinstall the door braces! It just shows that the body is much stiffer and stronger than many people think.
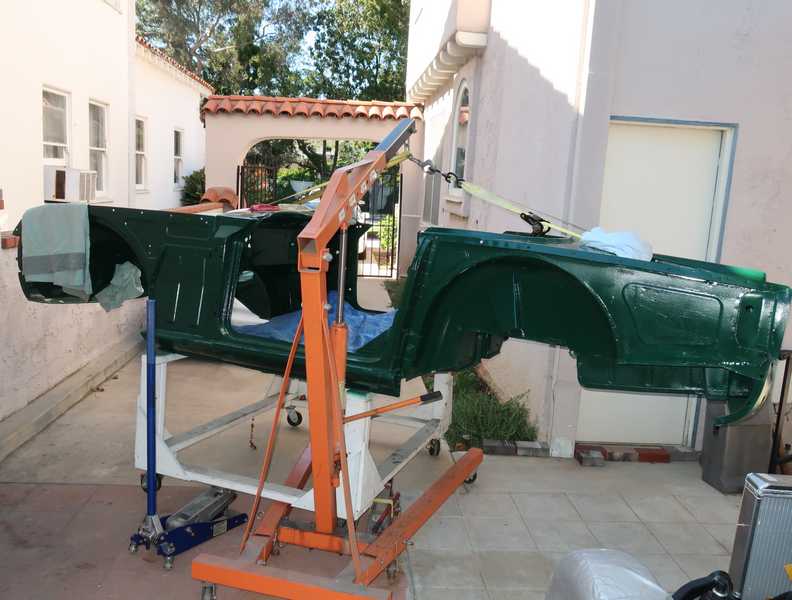
Lowering the body onto the chassis took the better part of an hour. I went slowly to make certain that nothing interfered and that the body stayed aligned with its mounting points.
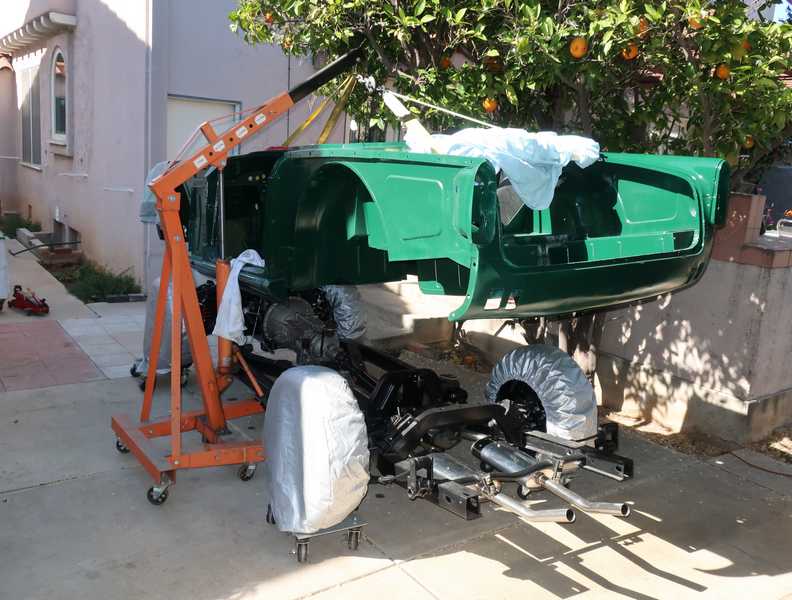
Finally, it was down.
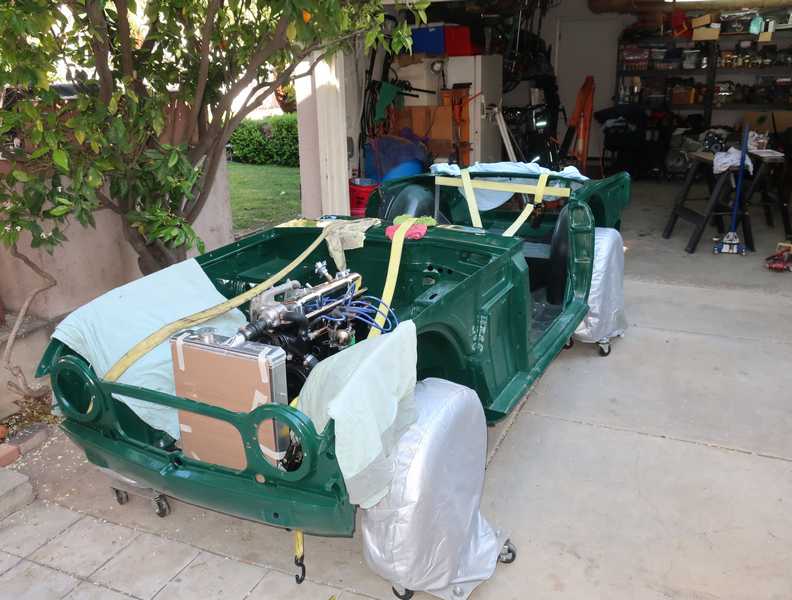
I had threaded long bolts upward through a few of the mounting holes to act as keys for aligning the body and frame. All the holes then lined up well, so installing the mounting hardware was easy.
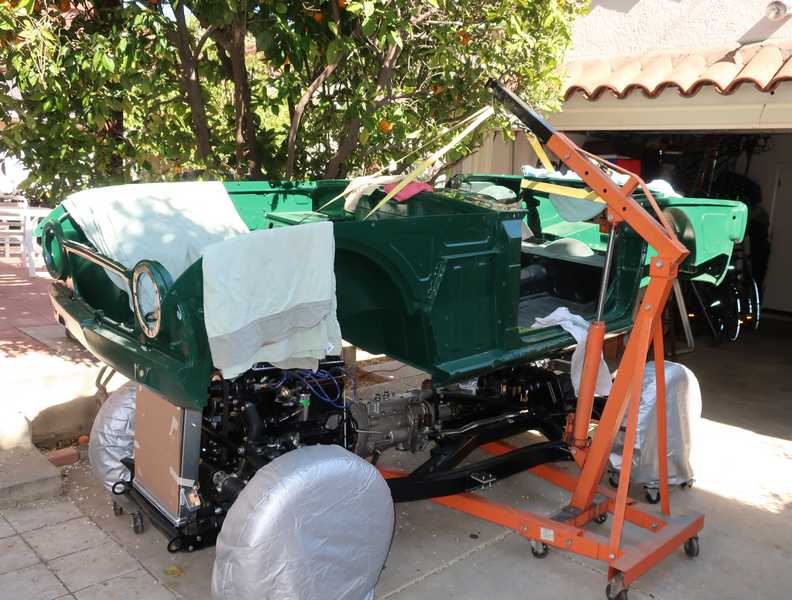
I had to finagle the spacers a little, but, in the end, it all fit well. The body was straight and level; keeping it on the frame for the rocker and floor replacements really paid off here. Below, the body is bolted to the frame.
And it's starting to look more and more like a car!